Arduino ได้เปิดตัว Arduino CLI เวอร์ชัน 1.0.0 ซึ่งเป็นเวอร์ชันเสถียรแรกที่ผู้ใช้และนักพัฒนาสามารถมั่นใจได้ว่า API ของซอฟต์แวร์จะไม่เปลี่ยนแปลงไปตามกาลเวลา หรืออย่างน้อยที่สุดก็จะมีการเปลี่ยนแปลงเพียงเล็กน้อยที่ไม่ส่งผลกระทบต่อการทำงานของแอปพลิเคชันที่ใช้งานอยู่บน API นี้
เราได้ดู Arduino CLI เป็นครั้งแรกเมื่อยังอยู่ในช่วงอัลฟ่าตั้งแต่ปี 2018 Arduino CLI เวอร์ชัน 1.0.0 ได้รับการปล่อยออกมาเงียบ ๆ เมื่อประมาณสองเดือนที่แล้ว แต่เพิ่งมี การประกาศอย่างเป็นทางการในขณะนี้ และขณะนี้ยูทิลิตีอยู่ในเวอร์ชัน 1.0.4 โดยมีการแก้ไขบั๊กหลายอย่างแล้ว
การเปิดตัว Arduino CLI 1.0
Arduino อธิบายว่ามี 3 วิวิธีในการผสานและใช้งานคุณสมบัติของยูทิลิตี้:
- อินเทอร์เฟสบรรทัดคำสั่ง หรือ Command line interface (CLI) สำหรับจัดการบอร์ดและไลบรารีต่าง ๆ คอมไพล์สเก็ตช์ และอัปโหลดโค้ดไปยังบอร์ด Arduino
- อินเทอร์เฟส gRPCช่วยให้นักพัฒนาสามารถโต้ตอบกับ CLI โดยใช้ภาษาการเขียนโปรแกรมที่ต้องการ ซึ่งช่วยในการสร้างแอปพลิเคชันหรือบริการแบบกำหนดเองที่ใช้ฟังก์ชันการทำงานเต็มรูปแบบของระบบนิเวศ Arduino โดยสามารถใช้สร้าง IDE หรือปลั๊กอินแบบกำหนดเองได้
- โมดูล Go เพื่อใช้แพ็คเกจ Arduino CLI ภายในแอปพลิเคชันที่เขียนโปรแกรมด้วยภาษา Go
คุณจะพบบันทึกการเปลี่ยนแปลง (changelog) โดยละเอียดสำหรับ Arduino CLI เวอร์ชัน 1.0.0 ถึง 1.0.4 ได้บน GitHub
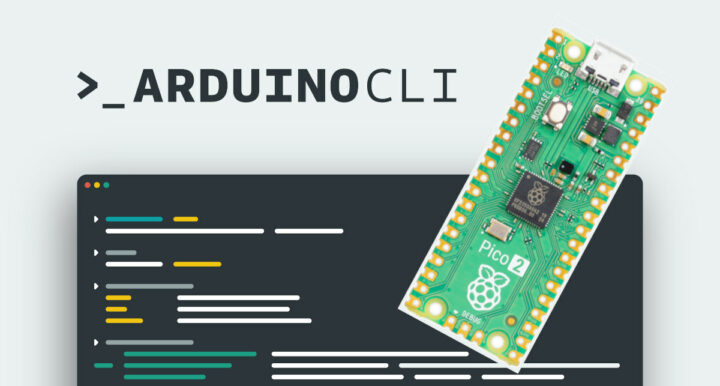
การทดสอบ Arduino CLI กับ Raspberry Pi Pico 2
เราได้ติดตั้ง Arduino CLI 1.0.4 บนแล็ปท็อปที่ใช้ Ubuntu 22.04 เพื่อทดลองใช้งานสั้น ๆ มีการเปลี่ยนแปลงมากมายตั้งแต่เวอร์ชันอัลฟ่าถูกปล่อยเมื่อหกปีที่แล้ว โดยเริ่มจากขั้นตอนการติดตั้ง
|
1 2 |
cd ~/edev/arduino curl -fsSL https://raw.githubusercontent.com/arduino/arduino-cli/master/install.sh | sh |
โดยจะติดตั้ง arduino-cli ในไดเร็กทอรี bin ของไดเร็กทอรีปัจจุบัน ในกรณีนี้คือ ~/edev/arduino/bin คนส่วนใหญ่จะติดตั้งในไดเร็กทอรีที่อยู่ใน PATH
มีคำสั่งเพิ่มเติมหลายอย่าง เช่น burn-bootloader, daemon เพื่อรัน Arduino CLI เป็น gRPC daemon, upgrade สำหรับอัปเกรดคอร์และไลบรารีที่ติดตั้งไว้ และคำสั่งอื่น ๆ:
|
1 2 3 4 5 6 7 8 9 10 11 12 13 14 15 16 17 18 19 20 21 22 23 24 25 26 27 28 29 30 31 32 33 34 35 36 37 38 39 40 41 42 43 44 |
jaufranc@CNX-LAPTOP-5:~/edev/Arduino/bin$ ./arduino-cli version arduino-cli Version: 1.0.4 Commit: a0d912da Date: 2024-08-12T13:42:36Z jaufranc@CNX-LAPTOP-5:~/edev/Arduino/bin$ ./arduino-cli Arduino Command Line Interface (arduino-cli). Usage: arduino-cli [command] Examples: ./arduino-cli <command> [flags...] Available Commands: board Arduino board commands. burn-bootloader Upload the bootloader. cache Arduino cache commands. compile Compiles Arduino sketches. completion Generates completion scripts config Arduino configuration commands. core Arduino core operations. daemon Run the Arduino CLI as a gRPC daemon. debug Debug Arduino sketches. help Help about any command lib Arduino commands about libraries. monitor Open a communication port with a board. outdated Lists cores and libraries that can be upgraded sketch Arduino CLI sketch commands. update Updates the index of cores and libraries upgrade Upgrades installed cores and libraries. upload Upload Arduino sketches. version Shows version number of Arduino CLI. Flags: --additional-urls strings Comma-separated list of additional URLs for the Boards Manager. --config-dir string Sets the default data directory (Arduino CLI will look for configuration file in this directory). --config-file string The custom config file (if not specified the default will be used). -h, --help help for arduino-cli --json Print the output in JSON format. --log Print the logs on the standard output. --log-file string Path to the file where logs will be written. --log-format string The output format for the logs, can be: text, json (default "text") --log-level string Messages with this level and above will be logged. Valid levels are: trace, debug, info, warn, error, fatal, panic (default "info") --no-color Disable colored output. Use "arduino-cli [command] --help" for more information about a command. |
คุณจะสามารถทำงานส่วนใหญ่ที่ทำใน Arduino IDE ได้จากบรรทัดคำสั่ง มาทำตามคู่มือการเริ่มต้นใช้งานในเอกสารโดยเริ่มจากการสร้างไฟล์การตั้งค่าเริ่มต้นสำหรับ arduino-cli:
|
1 2 |
jaufranc@CNX-LAPTOP-5:~/edev/Arduino$ arduino-cli config init Config file written to: /home/jaufranc/.arduino15/arduino-cli.yaml |
เราสามารถตรวจสอบเนื้อหาของไฟล์ YAML ได้:
|
1 2 3 |
jaufranc@CNX-LAPTOP-5:~/edev/Arduino$ cat ~/.arduino15/arduino-cli.yaml board_manager: additional_urls: [] |
เรามีบอร์ด Raspberry Pi Pico 2 บนโต๊ะ ดังนั้นเรามาลองใช้กัน เนื่อง Raspberry Pi Pico Arduino Core 4.0.x รองรับบอร์ดนี้ เราได้เพิ่ม URL ของบอร์ดลงในไฟล์ YAML ด้วยตนเอง:
|
1 2 |
additional_urls: - https://github.com/earlephilhower/arduino-pico/releases/download/global/package_rp2040_index.json |
แต่หลังจากอ่านเอกสารเพิ่มเติมแล้ว เราได้สังเกตเห็นว่ามีวิธีการเพิ่ม URL ของบอร์ด (เช่น สำหรับ ESP32) ดังนี้:
|
1 |
arduino-cli core update-index --additional-urls https://espressif.github.io/arduino-esp32/package_esp32_index.json |
เราสามารถอัปเดต local cache ของแพลตฟอร์มและไลบรารีที่เลือกได้:
|
1 2 3 |
jaufranc@CNX-LAPTOP-5:~/edev/Arduino$ arduino-cli core update-index Downloading index: package_index.tar.bz2 downloaded Downloading index: package_rp2040_index.json downloaded |
มาสร้างไดเร็กทอรีสำหรับ sketch กัน…
|
1 2 |
$ arduino-cli sketch new cnxsoft-sketch cd cnxsoft-sketch/ |
…และเขียนตัวอย่าง blink (ไฟกระพริบ) ในไฟล์ cnxsoft-sketch.ino ที่เพิ่งสร้างขึ้น:
|
1 2 3 4 5 6 7 8 9 10 11 12 13 |
// the setup function runs once when you press reset or power the board void setup() { // initialize digital pin LED_BUILTIN as an output. pinMode(LED_BUILTIN, OUTPUT); } // the loop function runs over and over again forever void loop() { digitalWrite(LED_BUILTIN, HIGH); // turn the LED on (HIGH is the voltage level) delay(1000); // wait for a second digitalWrite(LED_BUILTIN, LOW); // turn the LED off by making the voltage LOW delay(1000); // wait for a second } |
มาเชื่อมต่อ Raspberry Pi Pico 2 เข้ากับแล็ปท็อปในโหมด bootloader กัน บอร์ดจะปรากฏในรายการ:
|
1 2 3 |
$ arduino-cli board list Port Protocol Type Board Name FQBN Core UF2_Board uf2conv UF2 Devices Unknown |
เราหวังว่าจะได้ผลลัพธ์ที่ดีกว่านี้ แต่บางทีอาจเป็นเพราะมันเป็นบอร์ด RP2350 ทั่วไป:
|
1 2 3 4 5 6 |
./arduino-cli board search rp2350 Board Name FQBN Platform ID Generic RP2350 rp2040:rp2040:generic_rp2350 rp2040:rp2040 Solder Party RP2350 Stamp rp2040:rp2040:solderparty_rp2350_stamp rp2040:rp2040 Solder Party RP2350 Stamp XL rp2040:rp2040:solderparty_rp2350_stamp_xl rp2040:rp2040 SparkFun ProMicro RP2350 rp2040:rp2040:sparkfun_promicrorp2350 rp2040:rp2040 |
|
1 2 3 4 5 6 |
jaufranc@CNX-LAPTOP-5:~/edev/Arduino$ arduino-cli compile --fqbn rp2040:rp2040:generic_rp2350 cnxsoft-sketch Sketch uses 49840 bytes (0%) of program storage space. Maximum is 16769024 bytes. Global variables use 9764 bytes (1%) of dynamic memory, leaving 514524 bytes for local variables. Maximum is 524288 bytes. Used platform Version Path rp2040:rp2040 4.0.1 /home/jaufranc/.arduino15/packages/rp2040/hardware/rp2040/4.0.1 |
ตอนนี้ดูดีแล้ว ขั้นตอนสุดท้ายคือการอัปโหลดเฟิร์มแวร์ไปยังบอร์ด Raspberry Pi Pico 2:
|
1 2 3 4 5 6 |
jaufranc@CNX-LAPTOP-5:~/edev/Arduino$ arduino-cli upload -p /media/jaufranc/RP2350/ --fqbn rp2040:rp2040:generic_rp2350 cnxsoft-sketch Converting to uf2, output size: 112128, start address: 0x2000 Scanning for RP2040 devices Flashing /media/jaufranc/RP2350 (RP2350) Wrote 112128 bytes to /media/jaufranc/RP2350/NEW.UF2 New upload port: /media/jaufranc/RP2350/ (serial) |
เท่านี้ก็เรียบร้อยแล้ว และไฟ LED ในตัวของบอร์ดก็กระพริบอยู่จริง ๆ นั่นเป็นการเริ่มต้นที่ค่อนข้างง่าย และมันอาจช่วยเพิ่มประสิทธิภาพในการทำงานของผู้ที่ชอบทำงานจากบรรทัดคำสั่งมากกว่าการใช้ Arduino IDE
แปลจากบทความภาษาอังกฤษ : Arduino CLI 1.0 released – Let’s try it with the Raspberry Pi Pico 2

บรรณาธิการข่าวและบทความภาษาไทย CNX Software ได้มีความสนใจในด้านเทคโนโลยี โดยเฉพาะ Smart Home และ IoT


