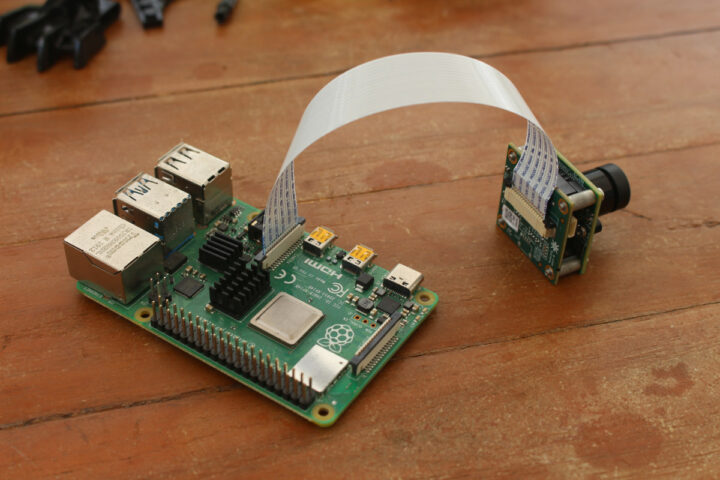
กล้อง e-con Systems e-CAM20_CURB เป็นกล้องถ่ายภาพสี 2.3 MP แบบ fixed focus และ Global shutter ที่ออกแบบมาสำหรับ Raspberry Pi 4 และบริษัทได้ส่งตัวอย่างมาให้เราเพื่อประเมินและรีวิว เราจะเริ่มต้นด้วยกาให้ขอมูลสเปค จากนั้นตรวจสอบเนื้อหาในแพ็คเกจ เชื่อมต่อกล้องกับ Raspberry Pi 4 โดยใช้ขาตั้ง DIY LEGO แสดงวิธีเข้าถึงทรัพยากรสำหรับกล้อง และลองใช้เครื่องมือที่มีให้ใน Raspberry Pi OS หรือ Yocto Linux image
สเปคของ e-CAM20_CURB
กล้องประกอบด้วยสองบอร์ดที่มีคุณสมบัติดังต่อไปนี้:
- eCAM217_CUMI0234_MOD กล้องสี full HD พร้อมอินเทอร์เฟซ 4-lane MIPI CSI-2
- ON Semiconductor AR0234CS เซนเซอร์ภาพ CMOS ที่มีฟอร์มแฟกเตอร์ขนาด 1/2.6 นิ้ว
- Global shutter (คือการการที่เซนเซอร์จะเก็บข้อมูลภาพของทุกพิกเซลพร้อม ๆ กัน)
- Onboard เซ็นเซอร์ภาพ ISP จาก ON Semiconductor
- สตรีมมิ่ง UYVY แบบไม่บีบอัด
- HD (1280 x 720) สูงสุด 120 เฟรมต่อวินาที
- Full HD (1920 x 1080) สูงสุด 65 fps
- 2.3 MP (1920 x 1200) สูงสุด 60 fps
- อินพุตทริกเกอร์ฮาร์ดแวร์ภายนอก
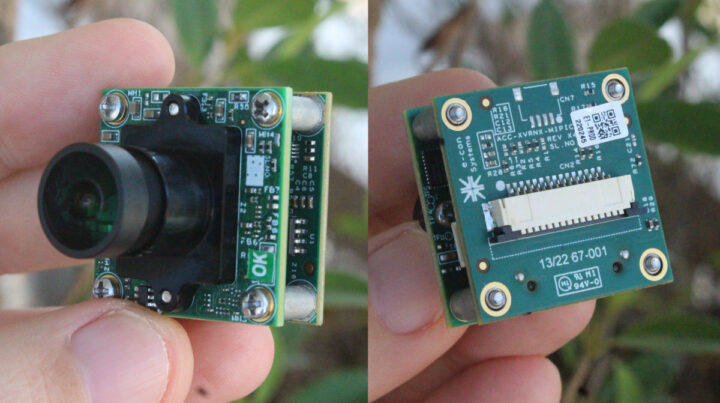
- อะแดปเตอร์ ACC-XVRNX-MIPICAMERA พร้อมขั้วต่อ FFC 15 พินสำหรับเชื่อมต่อกับ Raspberry Pi
- ขนาด – 30 x 30 มม. (ความสูงขึ้นอยู่กับเลนส์และการปรับโฟกัส)
- ช่วงอุณหภูมิ – -30 °C ถึง 70 °C
- การปฏิบัติตาม – FCC และ RoHS
บริษัทให้บริการภาพทั้ง Yocto และ Raspbian / Raspberry Pi OS 32 บิต พร้อมไดรเวอร์กล้อง V4L2 Linux และเครื่องมือ Gstreamer
แกะกล่องกล้อง e-CAM20_CURB
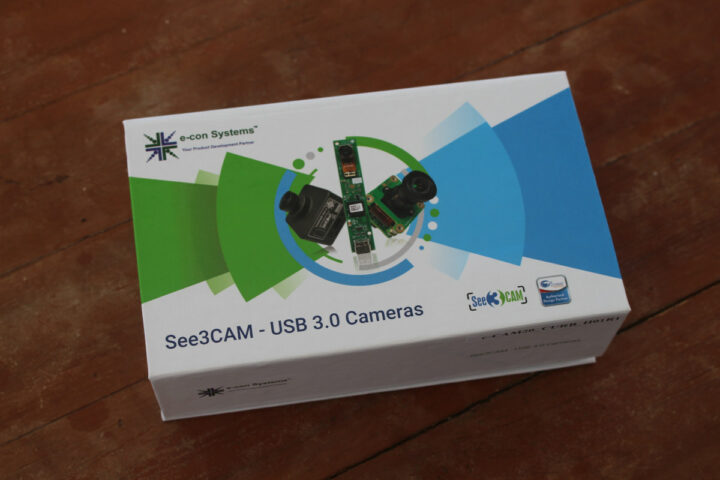
ในตอนแรกฉันคิดว่าฉันได้รับพัสดุผิด เพราะได้กล่องกล้อง See3CAM USB 3.0
แต่ไม่ต้องกังวลไป เพราะ e-con Systems ใช้แพ็คเกจมาตรฐานที่มีสติ๊กเกอร์ “e-CAM20_CURB_H01R1” เพื่อยืนยันว่าฉันได้รับกล้องรุ่นที่ถูกต้อง
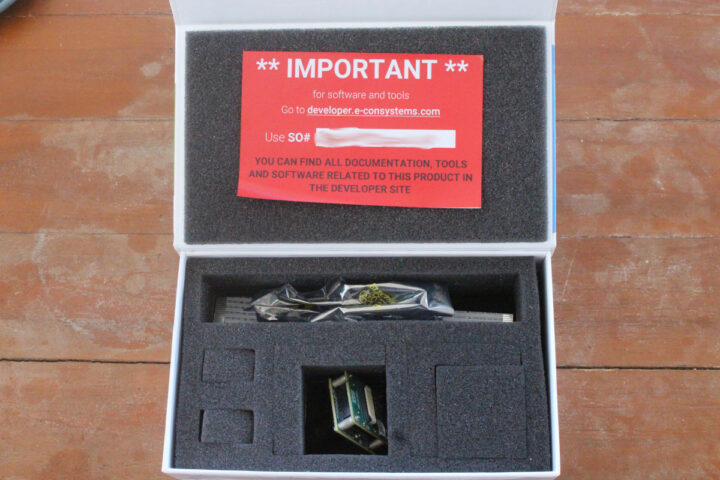
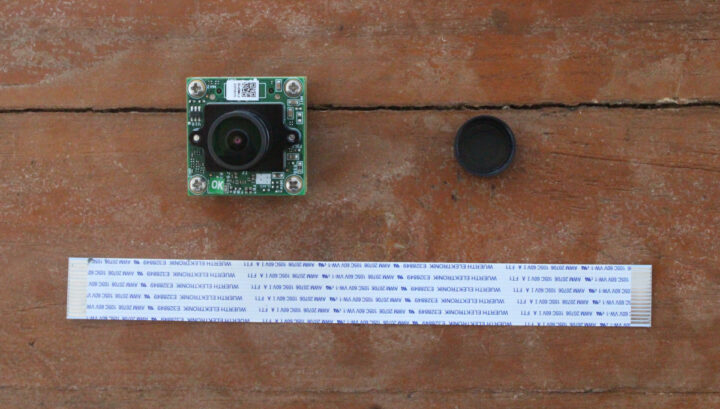
เราจะพบกล้องในถุงป้องกันไฟฟ้าสถิตย์และสายเคเบิล FPC ขนาด 15 ซม. สำหรับเชื่อมต่อกับ Raspberry Pi นอกจากนี้ เราจะพบกระดาษสีแดงติดด้านบนที่มีหมายเลข SO (ใบสั่งขาย) ที่เราจะจะใช้ถึงเอกสารประกอบและอิมเมจ OS
เลนส์ของกล้องปกป้องด้วยฝาครอบ ซึ่งฉันถอดออกตามภาพถ่ายด้านล่าง
การเชื่อมต่อ Raspberry Pi และติดตั้งตัวต่อ DIY LEGO
การเชื่อมต่อทำได้ง่ายมาก และสิ่งเดียวที่คุณต้องระวังคือทิศทางของสายเคเบิล FPC แล้วค่อยๆ ดึงคลิปพลาสติกสีดำออกจากตัวเชื่อมต่อบน Raspberry Pi และกล้อง e-CAM20_CURB คุณจะต้องเสียบสายเคเบิลในลักษณะที่ด้านสีน้ำเงินของสายเคเบิลหันเข้าหาคลิปพลาสติกสีดำ เมื่อเสร็จแล้วให้ดันคลิปพลาสติกกลับเข้าที่
กล่าวคือ ด้านสีน้ำเงิน (ไม่ใช่ตัวนำไฟฟ้า) ของสายเคเบิลจะหันไปทางพอร์ต Ethernet ของบอร์ด Raspberry Pi และด้านตัวนำ (ที่มีข้อความ) จะหันไปทางพอร์ต HDMI
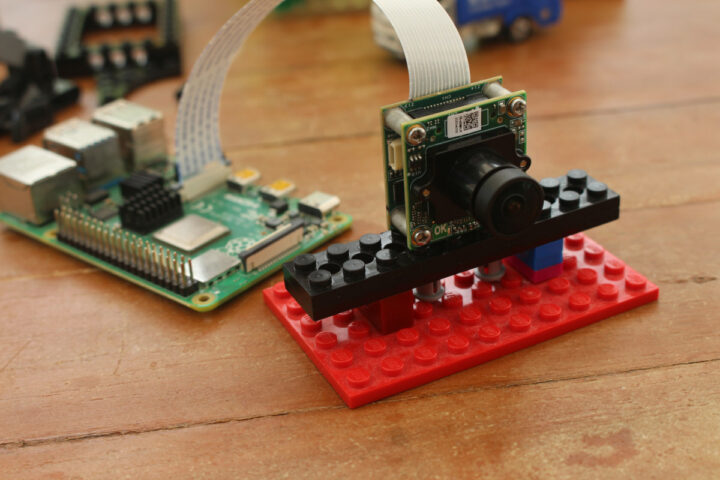
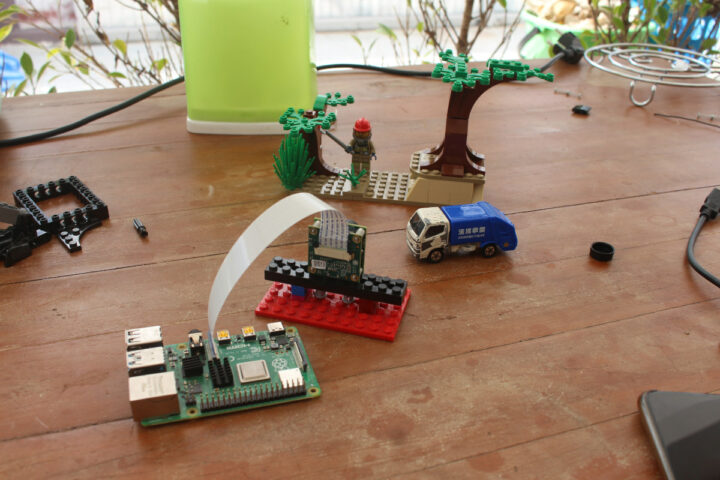
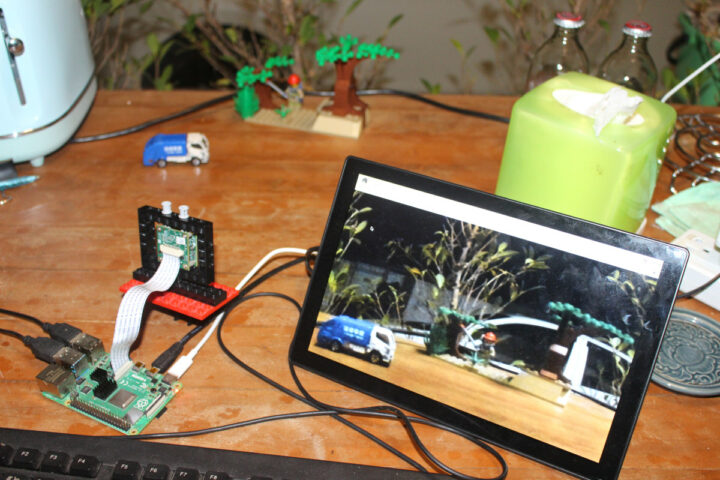
เนื่องจากกล้องจะต่ำเกินไปเมื่อวางบนโต๊ะและไม่สะดวกในการทดสอบ ฉันจึงต้องหาวิธีการติดตั้งแบบ DIY ปรากฎว่าระยะห่างระหว่างตัวเว้นระยะบนกล้องนั้นเหมาะสำหรับตัวต่อ LEGO พอดี ดังนั้นจึงง่ายต่อการสร้างตัวยึด และกล้องก็ติดแน่นกับฐานของมัน
เราต้องหาธีมที่มีสีสันด้วยเลโก้และรถบรรทุกขยะเพิ่มเติม…
เข้าถึงเอกสาร e-CAM20_CURB, Raspberry Pi OS และ Yocto อิมเมจ
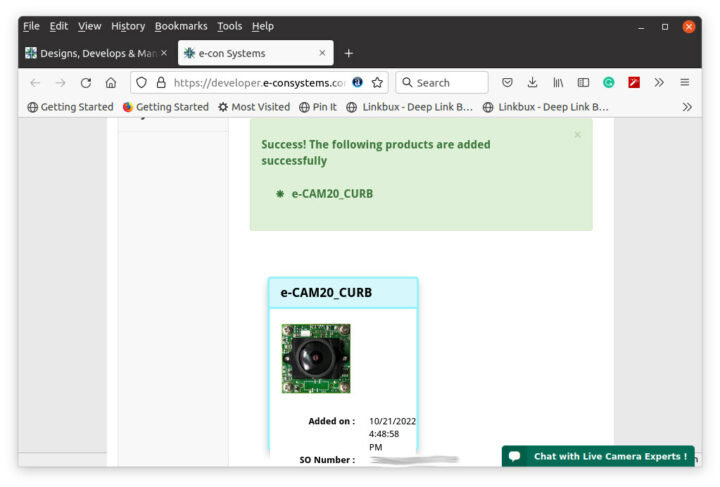
แหล่งข้อมูลทั้งหมดเพื่อเริ่มต้นใช้งานกล้องสามารถเข้าถึงได้ผ่านเว็บไซต์ของผู้พัฒนา ก่อนอื่นต้องลงทะเบียนและเข้าสู่ระบบด้วยที่อยู่อีเมลของคุณ
ในขั้นตอนนี้ เราจะต้องใส่ SO# ของคุณที่จากกระดาษสีแดงที่เราพบตอนเปิดกล่อง
และผลิตภัณฑ์จะได้รับการลงทะเบียนอย่างเป็นทางการบนเว็บไซต์ e-Con Systems
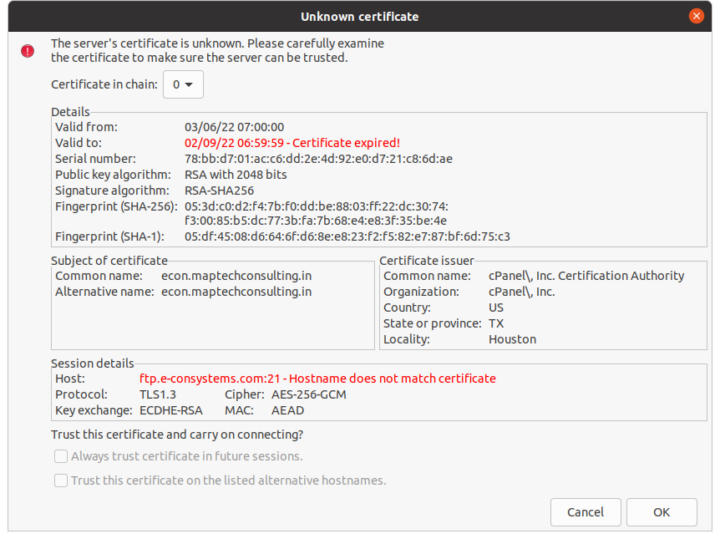
เราจะได้รับลิงค์ FTP พร้อมข้อมูลประจำตัว (ชื่อผู้ใช้และรหัสผ่าน) ครั้งแรกที่ฉันพยายามไปที่เซิร์ฟเวอร์ FTP โดยตรงใน Firefox แต่ฉันไม่เจอหน้าขอข้อมูลประจำตัวและเป็นหน้าว่าง ดังนั้นฉันจึงใช้ Filezilla เพื่อดาวน์โหลดไฟล์แทน
ฉันได้รับแจ้งเกี่ยวกับปัญหาบางอย่างเกี่ยวกับใบรับรอง SSL แต่ไม่มีปัญหา ฉันยังดาวน์โหลดไฟล์ทั้งหมดสำหรับกล้องได้:
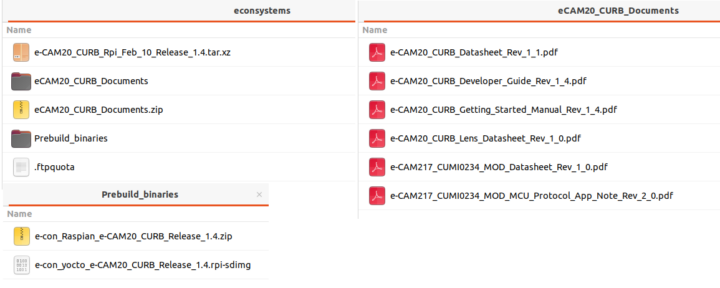
บริษัทได้จัดเตรียมไบนารีที่สร้างไว้ล่วงหน้าด้วยอิมเมจ Yocto และ Raspbian, patchsets และ meta laye ในกรณีที่คุณต้องการสร้างอิมเมจด้วยตัวเอง รวมถึงเอกสารประกอบที่มีเอกสารข้อมูลสำหรับกล้องและส่วนประกอบหลัก คู่มือเริ่มต้นใช้งาน และ คู่มือนักพัฒนาอธิบายวิธีสร้างโค้ดจากแหล่งที่มาและปรับแต่งอิมเมจ
ทดสอบกล้อง e-CAM20_CURB บน Raspberry Pi 4 โดยใช้ Yocto
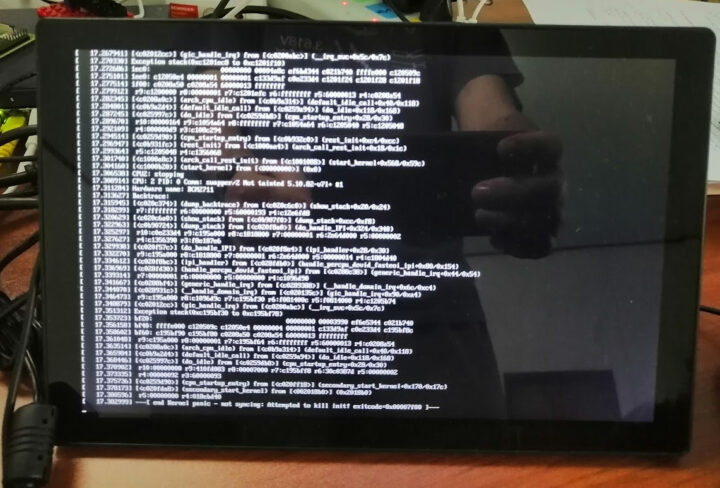
ฉันจะใช้ข้อมูลจากคู่มือเริ่มต้นใช้งานเป็นหลัก ตอนแรกฉันตัดสินใจใช้อิมเมจ “Raspbian” และ แฟลช ด้วย USBImager แต่การบูตไม่ทำงานอย่างที่คาดไว้เนื่องจากเเกิดปัญหาคอร์เนลแพนิค (Kernel panic)
ฉันลองใช้แฟลชอิมเมจ OS อีกครั้ง แต่ครั้งที่สองฉันพบแต่หน้าจอสีดำ บริษัทไม่ได้ให้ MD5 checksums สำหรับอิมเมจ ดังนั้นฉันจึงไม่สามารถตรวจสอบได้อย่างง่ายดายว่ามีปัญหาระหว่างการดาวน์โหลดหรือไม่ หรือหากเป็นไปได้ อาจเป็นเพราะ microSD card ของฉัน ( อีกครั้ง) มีปัญหา ดังนั้นฉันจึงเลือกใช้อิมเมจ Yocto ที่เล็กกว่าซึ่งใช้งานได้ดีและมาพร้อมกับเครื่องมือแบบเดียวกับอิมเมจ Raspbian
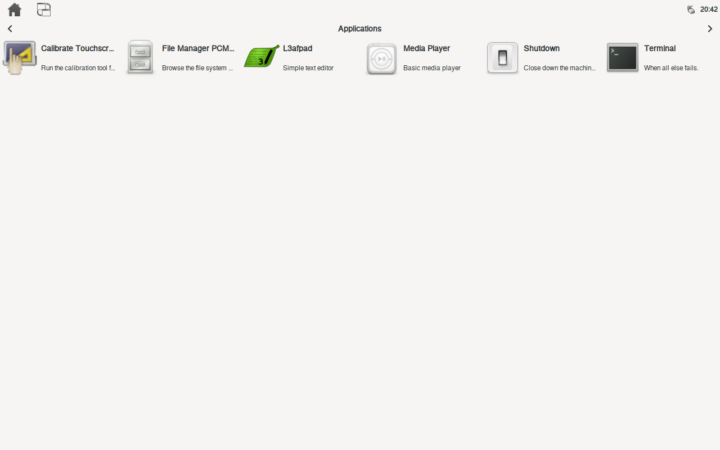
แดชบอร์ดมีไอคอน 5 ไอคอนพร้อมแอปปรับเทียบหน้าจอสัมผัส ตัวจัดการไฟล์ โปรแกรมแก้ไขข้อความ L3afpad ปุ่มปิดเครื่อง และเทอร์มินัลที่เราจะเรียกใช้คำสั่งทั้งหมด
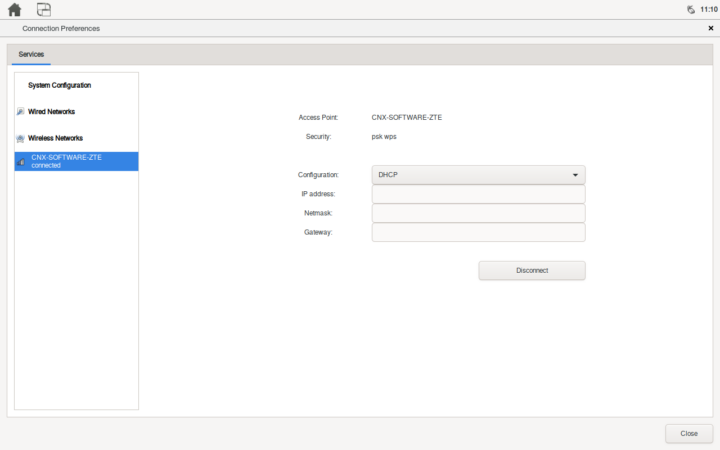
ไอคอนที่มุมขวาบนช่วยให้คุณเข้าถึงหน้าต่างการตั้งค่า ซึ่งเป็นประโยชน์อย่างมากในการกำหนดค่า WiFi หากคุณไม่ได้ใช้อีเธอร์เน็ตกับ DHCP
หมายเหตุ: คุณสามารถถ่ายภาพหน้าจอตามที่แสดงบน Yocto ได้ดังนี้:
|
1 2 |
export DISPLAY=:0 screenshot test.png |
คุณจะพบ 2 สคริปต์ในรูทไดเรกทอรี (Root directory):
- gst_1080_stream.shใช้เพื่อแสดงเอาต์พุตของกล้องที่ 1920×1080 บนจอหน้าที่เชื่อมต่อกับ Raspberry Pi
- gst_1080_record.shใช้เพื่อบันทึกวิดีโอ Full HD ลงใน microSD card
ทั้ง 2 เรียกคำสั่ง Gstreamers เนื้อหาของ gst_1080_stream.sh :
|
1 |
gst-launch-1.0 v4l2src device=/dev/video0 ! video/x-raw ,width=1920,height=1080 ! videoconvert ! fpsdisplaysink video-sink=autovideosink text-overlay=false sync=false -v |
และของ gst_1080_record.sh :
|
1 |
gst-launch-1.0 --gst-debug-level=3 -v v4l2src device=/dev/video0 ! capsfilter caps="video/x-raw, width=1920,height=1080,framerate=30/1" ! queue ! v4l2convert ! videorate ! queue ! v4l2h264enc ! queue ! avimux ! filesink location = 1080p_recording.h264 |
เรียกใช้ gst_1080_stream.sh ก่อน
เอาต์พุตของกล้องแสดงขึ้นบนหน้าจอ HDMI ของฉันแทบจะในทันที ฉันแค่ต้องปรับโฟกัสแบบด้วยตนเอง (manually)เพื่อให้ได้ภาพที่ค่อนข้างชัดเจน
หมายเหตุเอกสารกำหนด:
การดำเนินการไปป์ไลน์ GStreamer ด้านบนควรดำเนินการจากเทอร์มินัลใน Raspberry pi GUI ไม่ใช่จากเทอร์มินัล UART (picocom หรือ minicom) ของ Host PC
ดังนั้นฉันจึงตรวจสอบจากเทอร์มินัลในหน้าจอที่เชื่อมต่อกับ Raspberry Pi แต่ในที่สุดฉันก็ค้นพบว่าสามารถเรียกใช้โปรแกรมทั้งหมดจากเทอร์มินัล SSH โดยเพียงแค่ส่งออกหน้าจอแสดงผลก่อน:
|
1 |
export DISPLAY=:0 |
เอาต์พุตจากสคริปต์สำหรับอ้างอิง:
|
1 2 3 4 5 6 7 8 9 10 11 12 13 14 15 16 17 18 19 20 21 22 23 24 25 |
Setting pipeline to PAUSED ... Pipeline is live and does not need PREROLL ... /GstPipeline:pipeline0/GstFPSDisplaySink:fpsdisplaysink0/GstAutoVideoSink:autovideosink0/GstXvImageSink:autovideosink0-actual-sink-xvimage: sync = false Setting pipeline to PLAYING ... New clock: GstSystemClock /GstPipeline:pipeline0/GstV4l2Src:v4l2src0.GstPad:src: caps = video/x-raw, width=(int)1920, height=(int)1080, framerate=(fraction)120/1, format=(string)UYVY, colorimetry=(string)bt709, interlace-mode=(string)progressive /GstPipeline:pipeline0/GstCapsFilter:capsfilter0.GstPad:src: caps = video/x-raw, width=(int)1920, height=(int)1080, framerate=(fraction)120/1, format=(string)UYVY, colorimetry=(string)bt709, interlace-mode=(string)progressive /GstPipeline:pipeline0/GstVideoConvert:videoconvert0.GstPad:src: caps = video/x-raw, width=(int)1920, height=(int)1080, framerate=(fraction)120/1, interlace-mode=(string)progressive, format=(string)YV12 /GstPipeline:pipeline0/GstFPSDisplaySink:fpsdisplaysink0.GstGhostPad:sink.GstProxyPad:proxypad0: caps = video/x-raw, width=(int)1920, height=(int)1080, framerate=(fraction)120/1, interlace-mode=(string)progressive, format=(string)YV12 /GstPipeline:pipeline0/GstFPSDisplaySink:fpsdisplaysink0/GstAutoVideoSink:autovideosink0.GstGhostPad:sink.GstProxyPad:proxypad1: caps = video/x-raw, width=(int)1920, height=(int)1080, framerate=(fraction)120/1, interlace-mode=(string)progressive, format=(string)YV12 /GstPipeline:pipeline0/GstFPSDisplaySink:fpsdisplaysink0/GstAutoVideoSink:autovideosink0/GstXvImageSink:autovideosink0-actual-sink-xvimage.GstPad:sink: caps = video/x-raw, width=(int)1920, height=(int)1080, framerate=(fraction)120/1, interlace-mode=(string)progressive, format=(string)YV12 /GstPipeline:pipeline0/GstFPSDisplaySink:fpsdisplaysink0/GstAutoVideoSink:autovideosink0.GstGhostPad:sink: caps = video/x-raw, width=(int)1920, height=(int)1080, framerate=(fraction)120/1, interlace-mode=(string)progressive, format=(string)YV12 /GstPipeline:pipeline0/GstFPSDisplaySink:fpsdisplaysink0.GstGhostPad:sink: caps = video/x-raw, width=(int)1920, height=(int)1080, framerate=(fraction)120/1, interlace-mode=(string)progressive, format=(string)YV12 /GstPipeline:pipeline0/GstVideoConvert:videoconvert0.GstPad:sink: caps = video/x-raw, width=(int)1920, height=(int)1080, framerate=(fraction)120/1, format=(string)UYVY, colorimetry=(string)bt709, interlace-mode=(string)progressive /GstPipeline:pipeline0/GstCapsFilter:capsfilter0.GstPad:sink: caps = video/x-raw, width=(int)1920, height=(int)1080, framerate=(fraction)120/1, format=(string)UYVY, colorimetry=(string)bt709, interlace-mode=(string)progressive /GstPipeline:pipeline0/GstFPSDisplaySink:fpsdisplaysink0/GstAutoVideoSink:autovideosink0/GstXvImageSink:autovideosink0-actual-sink-xvimage: sync = false /GstPipeline:pipeline0/GstFPSDisplaySink:fpsdisplaysink0: last-message = rendered: 15, dropped: 0, current: 28.41, average: 28.41 /GstPipeline:pipeline0/GstFPSDisplaySink:fpsdisplaysink0: last-message = rendered: 33, dropped: 0, current: 34.53, average: 31.45 /GstPipeline:pipeline0/GstFPSDisplaySink:fpsdisplaysink0: last-message = rendered: 51, dropped: 0, current: 34.38, average: 32.42 /GstPipeline:pipeline0/GstFPSDisplaySink:fpsdisplaysink0: last-message = rendered: 69, dropped: 0, current: 34.51, average: 32.94 /GstPipeline:pipeline0/GstFPSDisplaySink:fpsdisplaysink0: last-message = rendered: 87, dropped: 0, current: 34.42, average: 33.24 /GstPipeline:pipeline0/GstFPSDisplaySink:fpsdisplaysink0: last-message = rendered: 105, dropped: 0, current: 34.47, average: 33.44 /GstPipeline:pipeline0/GstFPSDisplaySink:fpsdisplaysink0: last-message = rendered: 119, dropped: 0, current: 27.69, average: 32.65 /GstPipeline:pipeline0/GstFPSDisplaySink:fpsdisplaysink0: last-message = rendered: 135, dropped: 0, current: 31.24, average: 32.47 .... |
เราสามารถกด Control+C เพื่อหยุดแอปในเทอร์มินัลได้ ลองทำเช่นเดียวกันกับสคริปต์ “บันทึก” คราวนี้เอาต์พุตของกล้องไม่ปรากฏบนหน้าจอแสดงผล และสิ่งที่เราได้รับคือข้อมูลในเทอร์มินัล:
|
1 2 3 4 5 6 7 8 9 10 11 12 13 14 15 16 17 18 19 20 21 22 23 24 25 26 27 28 29 30 31 32 33 34 35 36 37 38 39 40 41 42 43 44 45 46 47 48 49 50 51 52 53 54 55 56 |
sh-5.0# ./gst_1080_record.sh Setting pipeline to PAUSED ... 0:00:00.150419981 877 0x90e300 WARN v4l2 gstv4l2object.c:4209:gst_v4l2_object_probe_caps:<v4l2h264enc0:src> Failed to probe pixel aspect ratio with VIDIOC_CROPCAP: Invalid argument Pipeline is live and does not need PREROLL ... Setting pipeline to PLAYING ... New clock: GstSystemClock /GstPipeline:pipeline0/GstV4l2Src:v4l2src0.GstPad:src: caps = video/x-raw, width=(int)1920, height=(int)1080, framerate=(fraction)30/1, format=(string)UYVY, interlace-mode=(string)progressive, colorimetry=(string)bt709 /GstPipeline:pipeline0/GstCapsFilter:capsfilter0.GstPad:src: caps = video/x-raw, width=(int)1920, height=(int)1080, framerate=(fraction)30/1, format=(string)UYVY, interlace-mode=(string)progressive, colorimetry=(string)bt709 /GstPipeline:pipeline0/GstQueue:queue0.GstPad:sink: caps = video/x-raw, width=(int)1920, height=(int)1080, framerate=(fraction)30/1, format=(string)UYVY, interlace-mode=(string)progressive, colorimetry=(string)bt709 /GstPipeline:pipeline0/GstCapsFilter:capsfilter0.GstPad:sink: caps = video/x-raw, width=(int)1920, height=(int)1080, framerate=(fraction)30/1, format=(string)UYVY, interlace-mode=(string)progressive, colorimetry=(string)bt709 /GstPipeline:pipeline0/GstQueue:queue0.GstPad:src: caps = video/x-raw, width=(int)1920, height=(int)1080, framerate=(fraction)30/1, format=(string)UYVY, interlace-mode=(string)progressive, colorimetry=(string)bt709 /GstPipeline:pipeline0/v4l2convert:v4l2convert0.GstPad:src: caps = video/x-raw, framerate=(fraction)30/1, interlace-mode=(string)progressive, format=(string)YUY2, width=(int)1920, height=(int)1080, colorimetry=(string)bt709 /GstPipeline:pipeline0/GstVideoRate:videorate0.GstPad:src: caps = video/x-raw, framerate=(fraction)30/1, interlace-mode=(string)progressive, format=(string)YUY2, width=(int)1920, height=(int)1080, colorimetry=(string)bt709 /GstPipeline:pipeline0/GstQueue:queue1.GstPad:sink: caps = video/x-raw, framerate=(fraction)30/1, interlace-mode=(string)progressive, format=(string)YUY2, width=(int)1920, height=(int)1080, colorimetry=(string)bt709 /GstPipeline:pipeline0/GstQueue:queue1.GstPad:src: caps = video/x-raw, framerate=(fraction)30/1, interlace-mode=(string)progressive, format=(string)YUY2, width=(int)1920, height=(int)1080, colorimetry=(string)bt709 /GstPipeline:pipeline0/GstQueue:queue1.GstPad:src: caps = video/x-raw, framerate=(fraction)30/1, interlace-mode=(string)progressive, format=(string)YUY2, width=(int)1920, height=(int)1080, colorimetry=(string)bt709 /GstPipeline:pipeline0/v4l2h264enc:v4l2h264enc0.GstPad:src: caps = video/x-h264, stream-format=(string)byte-stream, alignment=(string)au, profile=(string)high, level=(string)4, width=(int)1920, height=(int)1080, pixel-aspect-ratio=(fraction)1/1, framerate=(fraction)30/1, interlace-mode=(string)progressive, colorimetry=(string)bt709 /GstPipeline:pipeline0/GstQueue:queue2.GstPad:sink: caps = video/x-h264, stream-format=(string)byte-stream, alignment=(string)au, profile=(string)high, level=(string)4, width=(int)1920, height=(int)1080, pixel-aspect-ratio=(fraction)1/1, framerate=(fraction)30/1, interlace-mode=(string)progressive, colorimetry=(string)bt709 /GstPipeline:pipeline0/GstQueue:queue2.GstPad:src: caps = video/x-h264, stream-format=(string)byte-stream, alignment=(string)au, profile=(string)high, level=(string)4, width=(int)1920, height=(int)1080, pixel-aspect-ratio=(fraction)1/1, framerate=(fraction)30/1, interlace-mode=(string)progressive, colorimetry=(string)bt709 /GstPipeline:pipeline0/GstAviMux:avimux0.GstPad:video_0: caps = video/x-h264, stream-format=(string)byte-stream, alignment=(string)au, profile=(string)high, level=(string)4, width=(int)1920, height=(int)1080, pixel-aspect-ratio=(fraction)1/1, framerate=(fraction)30/1, interlace-mode=(string)progressive, colorimetry=(string)bt709 Redistribute latency... /GstPipeline:pipeline0/v4l2h264enc:v4l2h264enc0.GstPad:sink: caps = video/x-raw, framerate=(fraction)30/1, interlace-mode=(string)progressive, format=(string)YUY2, width=(int)1920, height=(int)1080, colorimetry=(string)bt709 /GstPipeline:pipeline0/v4l2convert:v4l2convert0.GstPad:sink: caps = video/x-raw, width=(int)1920, height=(int)1080, framerate=(fraction)30/1, format=(string)UYVY, interlace-mode=(string)progressive, colorimetry=(string)bt709 0:00:00.349330444 877 0x925c90 WARN v4l2bufferpool gstv4l2bufferpool.c:1278:gst_v4l2_buffer_pool_dqbuf:<v4l2convert0:pool:src> Driver should never set v4l2_buffer.field to ANY 0:00:00.375340000 877 0x925cc0 WARN v4l2src gstv4l2src.c:978:gst_v4l2src_create:<v4l2src0> lost frames detected: count = 1 - ts: 0:00:00.197980673 0:00:00.404324815 877 0x925c60 WARN v4l2bufferpool gstv4l2bufferpool.c:809:gst_v4l2_buffer_pool_start:<v4l2h264enc0:pool:src> Uncertain or not enough buffers, enabling copy threshold 0:00:00.448002981 877 0x925cc0 WARN v4l2src gstv4l2src.c:978:gst_v4l2src_create:<v4l2src0> lost frames detected: count = 1 - ts: 0:00:00.259520155 0:00:00.476415111 877 0xb4a02d50 WARN v4l2bufferpool gstv4l2bufferpool.c:1278:gst_v4l2_buffer_pool_dqbuf:<v4l2h264enc0:pool:src> Driver should never set v4l2_buffer.field to ANY 0:00:00.478420518 877 0x925c30 FIXME basesink gstbasesink.c:3246:gst_base_sink_default_event:<filesink0> stream-start event without group-id. Consider implementing group-id handling in the upstream elements /GstPipeline:pipeline0/GstAviMux:avimux0.GstPad:src: caps = video/x-msvideo /GstPipeline:pipeline0/GstFileSink:filesink0.GstPad:sink: caps = video/x-msvideo 0:00:00.547811481 877 0x925cc0 WARN v4l2src gstv4l2src.c:978:gst_v4l2src_create:<v4l2src0> lost frames detected: count = 4 - ts: 0:00:00.351835691 0:00:00.603347092 877 0x925cc0 WARN v4l2src gstv4l2src.c:978:gst_v4l2src_create:<v4l2src0> lost frames detected: count = 2 - ts: 0:00:00.397979932 0:00:00.647031518 877 0x925cc0 WARN v4l2src gstv4l2src.c:978:gst_v4l2src_create:<v4l2src0> lost frames detected: count = 3 - ts: 0:00:00.459522340 .... 0:00:04.943636775 877 0x925cc0 WARN v4l2src gstv4l2src.c:978:gst_v4l2src_create:<v4l2src0> lost frames detected: count = 2 - ts: 0:00:04.705614006 0:00:04.981039497 877 0x925cc0 WARN v4l2src gstv4l2src.c:978:gst_v4l2src_create:<v4l2src0> lost frames detected: count = 3 - ts: 0:00:04.767162043 0:00:05.046930127 877 0x925cc0 WARN v4l2src gstv4l2src.c:978:gst_v4l2src_create:<v4l2src0> lost frames detected: count = 3 - ts: 0:00:04.828688765 0:00:05.113381867 877 0x925cc0 WARN v4l2src gstv4l2src.c:978:gst_v4l2src_create:<v4l2src0> lost frames detected: count = 2 - ts: 0:00:04.874841950 0:00:05.151058627 877 0x925cc0 WARN v4l2src gstv4l2src.c:978:gst_v4l2src_create:<v4l2src0> lost frames detected: count = 3 - ts: 0:00:04.936382932 0:00:05.219209497 877 0x925cc0 WARN v4l2src gstv4l2src.c:978:gst_v4l2src_create:<v4l2src0> lost frames detected: count = 3 - ts: 0:00:04.997920784 ^Chandling interrupt. Interrupt: Stopping pipeline ... Execution ended after 0:00:05.086424645 Setting pipeline to NULL ... 0:00:05.285227515 877 0x925cc0 WARN v4l2src gstv4l2src.c:978:gst_v4l2src_create:<v4l2src0> lost frames detected: count = 2 - ts: 0:00:05.044071080 0:00:05.329868941 877 0x925cc0 WARN v4l2src gstv4l2src.c:978:gst_v4l2src_create:<v4l2src0> lost frames detected: count = 3 - ts: 0:00:05.105612154 .... 0:00:07.765494532 877 0x925cc0 WARN v4l2src gstv4l2src.c:978:gst_v4l2src_create:<v4l2src0> lost frames detected: count = 3 - ts: 0:00:07.520962284 0:00:07.832332643 877 0x925cc0 WARN v4l2src gstv4l2src.c:978:gst_v4l2src_create:<v4l2src0> lost frames detected: count = 4 - ts: 0:00:07.597885506 0:00:07.869181273 877 0x925c90 WARN v4l2allocator gstv4l2allocator.c:559:gst_v4l2_allocator_create_buf:<v4l2convert0:pool:src:allocator> error creating a new buffer: No buffer space available 0:00:07.869370347 877 0x925c90 ERROR v4l2bufferpool gstv4l2bufferpool.c:479:gst_v4l2_buffer_pool_alloc_buffer:<v4l2convert0:pool:src> failed to allocate buffer 0:00:07.869481421 877 0x925c90 WARN bufferpool gstbufferpool.c:305:do_alloc_buffer:<v4l2convert0:pool:src> alloc function failed 0:00:07.869961421 877 0x925cc0 WARN v4l2src gstv4l2src.c:978:gst_v4l2src_create:<v4l2src0> lost frames detected: count = 3 - ts: 0:00:07.659424987 0:00:08.471311773 877 0x925c90 WARN basetransform gstbasetransform.c:2167:default_generate_output:<v4l2convert0> could not get buffer from pool: flushing Freeing pipeline ... |
ฉันกด Control+C เพื่อหยุดการบันทึกและได้รับไฟล์ 1080p_recording.h264 ซึ่งฉันโอนไปยัง PC ผ่าน SSH เพื่อยืนยันว่าเป็นไฟล์ AVI ที่มีวิดีโอขนาด 1920 × 1080 @ 30 fps ที่เข้ารหัสด้วย H.264:
|
1 2 3 4 5 6 7 8 9 10 11 12 13 14 15 16 17 18 19 |
mediainfo 1080p_recording.h264 General Complete name : 1080p_recording.h264 Format : AVI Format/Info : Audio Video Interleave File size : 8.94 MiB FileExtension_Invalid : avi Video ID : 0 Format : AVC Format/Info : Advanced Video Codec Codec ID : H264 Width : 1 920 pixels Height : 1 080 pixels Display aspect ratio : 16:9 Frame rate : 30.000 FPS Color space : YUV Chroma subsampling : 4:2:0 |
ฉันได้อัปโหลดตัวอย่างไปยัง YouTube เพื่อใช้อ้างอิง:
การถ่ายทำในเวลากลางคืน วิดีโอมีความลื่นไหลแต่มีภาพไม่ค่อยชัด
การทำเช่นนี้ในช่วงกลางวันทำได้ดีกว่ามาก แต่การจัดแสงในวิดีโอด้านบนนั้นอาจจะไม่พอ ดังนั้นฉันจึงลองอีกครั้งโดยให้แสงแดดส่องเข้ามาบ้าง
เครื่องมือ gst-launch-1.0 นั้นทรงพลังและหลากหลาย แต่ถ้าคุณถามฉัน บรรทัดคำสั่งที่ใช้พารามิเตอร์นั้นไม่ง่ายและจำเป็นต้องเรียนรู้ที่จะเข้าใจอย่างถ่องแท้ และควรมีไฟล์ชื่อ “CAM20_CURB_GStreamer_Usage_Guide_<VER> .pdf” ที่อธิบายรายละเอียดนี้ซึ่งไม่มีอยู่ในเซิร์ฟเวอร์ FTP แต่สามารถถามได้จาก e-Con Systems แต่โชคดีที่รูปภาพของ Yocto และ Raspbian ยังมาพร้อมกับเครื่องมือ Gstreamer อีกอย่างคือ gst-capture ซึ่งให้คุณทดสอบกล้องได้นาน พารามิเตอร์ time String ก่อนอื่นเราต้องเลือกอุปกรณ์ video0:
|
1 2 3 4 5 6 7 8 9 10 11 12 13 14 15 16 17 18 19 20 21 22 23 24 25 26 |
root@raspberrypi4:~# gst-capture APPVERSION - 1.2 SETTING DEFAULT RESOLUTION ==================== Video devices detected ==================== [1]:video14 [2]:video12 [3]:video1 [4]:video10 [5]:video13 [6]:video11 [7]:video0 [8]:v4l-subdev0 ================================================================ Select the video streaming device = 7 open device name = /dev/video0 open device name = /dev/video0 Streaming successful! +==================================================================================+ | V4L2 command line application - 1.2 | +==================================================================================+ [1] Still Capture Mode [2] Streaming Mode [3] Features [4] Exit from application |
หลังจากนั้น เราจะสามารถสลับไปมาระหว่างโหมดถ่ายภาพนิ่งหรือโหมดสตรีม (วิดีโอ) และที่สำคัญกว่านั้นคือการเข้าถึงรายการฟังก์ชั่นจำนวนมากเพื่อควบคุมกล้องโดยละเอียด
|
1 2 3 4 5 6 7 8 9 10 11 12 13 14 15 16 17 18 19 20 21 22 23 24 25 26 27 28 29 |
+==================================================================================+ | V4L2 command line application - 1.2 | +==================================================================================+ [1] Still Capture Mode [2] Streaming Mode [3] Features [4] Exit from application Enter the option: 3 [1] -- User Controls [2] -- Brightness [3] -- Contrast [4] -- Saturation [5] -- Gamma [6] -- Gain [7] -- Horizontal Flip [8] -- Vertical Flip [9] -- White Balance Temperature [10] -- Sharpness [11] -- Camera Controls [12] -- Exposure Auto [13] -- ROI Window Size [14] -- ROI Exposure [15] -- Denoise [16] -- Exposure Compensation [17] -- Image Processing Controls [18] -- Link Frequency [19] -- Pixel Rate [20] -- Frame rate message [21] -- Exit from Features Menu |
ฉันลองด้วยตัวเองมาแล้ว แต่การดำเนินการทั้งหมดนั้นอยู่นอกเหนือขอบเขตของคู่มือทบทวน/คู่มือเริ่มต้นนี้ ดังนั้นฉันจะแสดงวิธีปรับความสว่างเป็นตัวอย่าง:
|
1 2 3 4 5 6 7 8 9 10 11 12 13 14 15 16 17 18 19 20 21 22 23 24 |
Enter the option: 2 =============================================================== Brightness Menu -- Range -15 to 15, Step Size = 1, Default Value = 0 =============================================================== [1] Choose Brightness level [2] Exit from Brightness menu Note: Current Brightness Value is 0 ======================================================== Please choose the option :1 Please enter the Brightness Value : 10 =============================================================== Brightness Menu -- Range -15 to 15, Step Size = 1, Default Value = 0 =============================================================== [1] Choose Brightness level [2] Exit from Brightness menu Note: Current Brightness Value is 10 ======================================================== Please choose the option : |
คุณยังสามารถดูวิดีโอด้านล่างเพื่อสาธิตสั้นๆ ด้วยสคริปต์และโปรแกรม gst-capture:
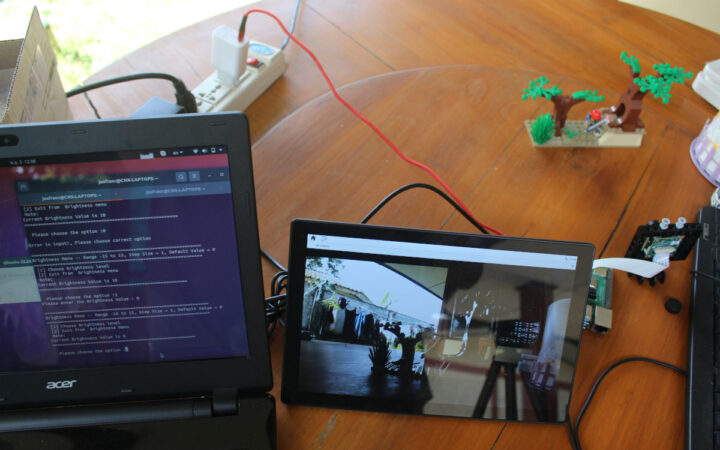
หากคุณเคยดูวิดีโอ คุณจะสังเกตเห็นว่าฉันต้องสลับไปมาระหว่างเทอร์มินัลและโปรแกรมหลังจากเปลี่ยนค่าแล้วไม่สะดวกจริงๆ ดังนั้นฉันขอแนะนำให้เชื่อมต่อหน้าจอที่สองหรือใช้โน๊ตบุคที่มี SSH และส่งออกหน้าจอแสดงผลก่อนที่จะเรียกใช้คำสั่ง:
|
1 |
export DISPLAY:=0 |
ฉันคิดเกี่ยวกับเรื่องนี้ในตอนท้ายของการทบทวนเท่านั้น มันควรจะถูกเพิ่มเข้าไปในเอกสาร e-Con Systems…
นอกจากปัญหาเล็กน้อยที่ฉันมีในตอนเริ่มต้นเกี่ยวกับอิมเมจ OS แล้ว ฉันยังได้รับประสบการณ์ที่ค่อนข้างดีกับกล้องซึ่งทำงานได้ดีกับอัตราเฟรมที่สูงในทุกสภาพแสงด้วย global shutter กล้องยังค่อนข้างใช้งานง่าย พร้อมเอกสารประกอบที่ดี และซอร์สโค้ดมีให้สำหรับผู้ที่ต้องการปรับแต่งระบบปฏิบัติการ ฉันขอขอบคุณ e-Con Systems ที่ส่งกล้อง e-CAM20_CURB แบบ Global shutter สำหรับ Raspberry Pi 4 มาให้รีวิว หากคุณสนใจ บริษัทขายในราคา $99 (~3,500฿) รวมค่าส่ง
แปลจากบทความภาษาอังกฤษ : Getting started with e-CAM20_CURB camera for Raspberry Pi 4

บรรณาธิการข่าวและบทความภาษาไทย CNX Software ได้มีความสนใจในด้านเทคโนโลยี โดยเฉพาะ Smart Home และ IoT

