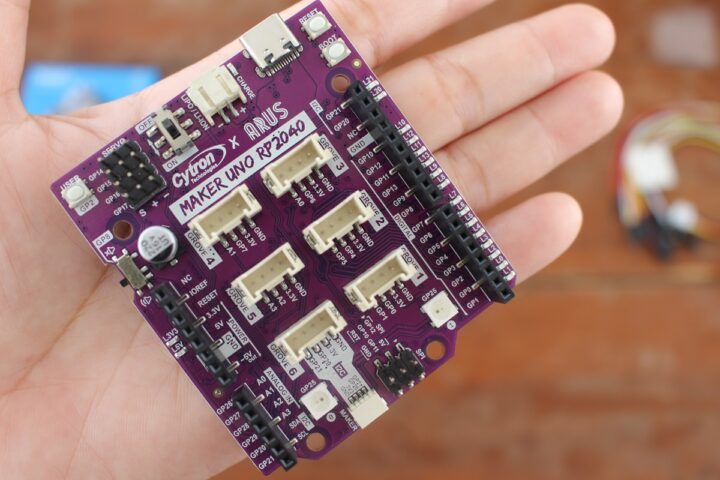
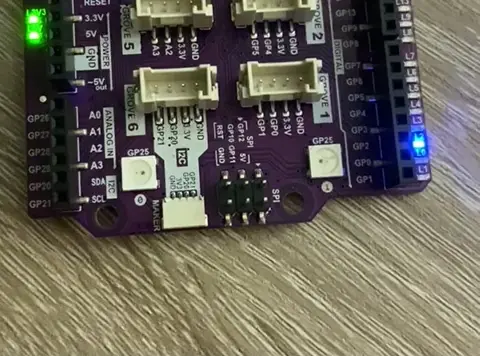
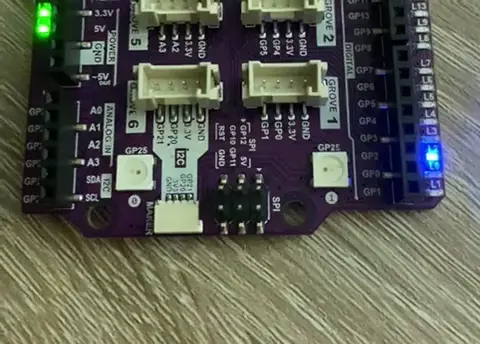
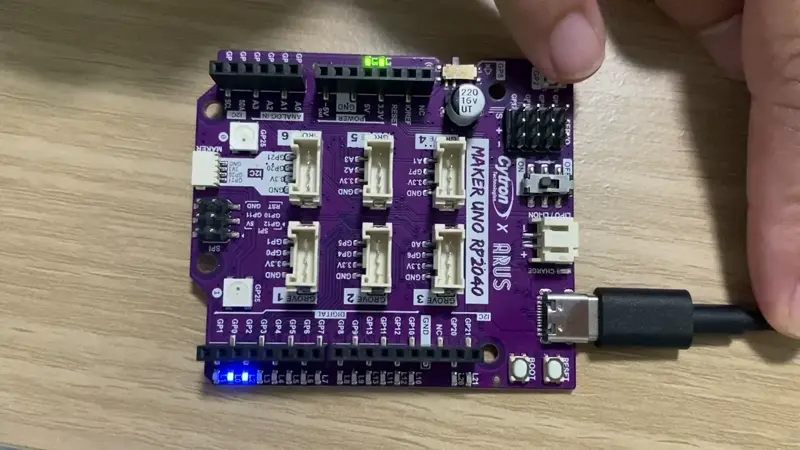
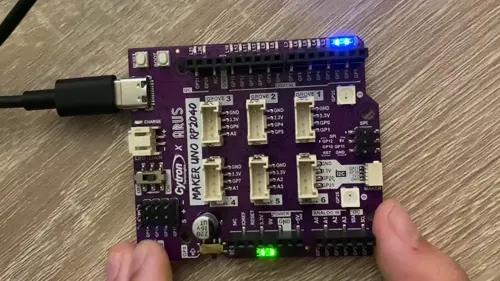
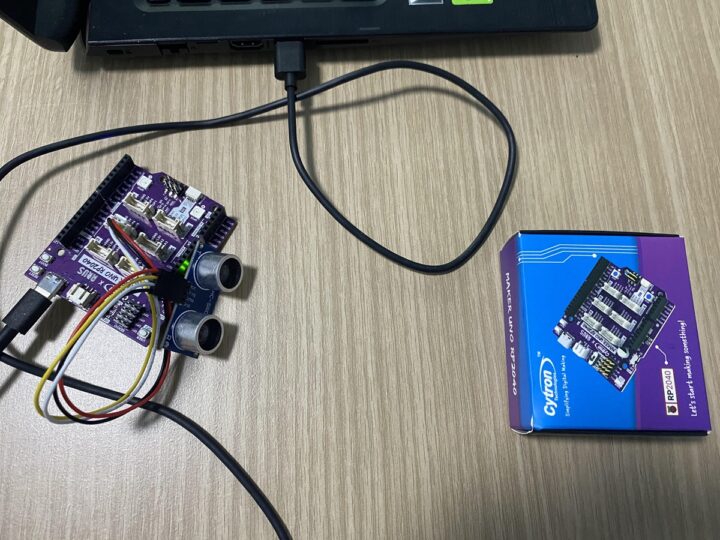
หลังจากที่เราได้ดูสเปคของ Cytron Maker Uno RP2040 และใช้งานบนโปรแกรม Arduino IDE พร้อมเชื่อมต่อกับอุปกรณ์ต่าง ๆ ใช้งานง่ายเหมาะสำหรับสำหรับผู้เริ่มต้นและผู้ใช้ขั้นสูงที่สามารถนำไปต่อยอดพัฒนาต่อไป
วันนี้เราจะทดลองใช้บอร์ด Maker Uno RP2040 พร้อมใช้งานบน Thonny IDE ด้วย CircuitPython โดยเริ่มจากติดตั้งโปรแกรม Thonny IDE แล้วทำการเชื่อมต่อบอร์ด, การเขียนโปรแกรม Blink ไฟกระพริบ, ไฟ LED แบบ RGB, กดปุ่มไฟติด, buzzer ทำให้มีเสียง, ใช้งานร่วมกับ Micro Servo Motor, อ่านค่าเซนเซอร์วัดความชื้นด้วย Maker Soil Module และวัดระยะห่างวัดถุด้วยโมดูลเซนเซอร์ Ultrasonic HC-SR04
การติดตั้งโปรแกรม Thonny IDE
โดยการทดสอบกับบอร์ด Maker Uno RP2040 จะใช้ Thonny เป็น Python IDE ระดับสำหรับเริ่มต้น ซึ่งออกแบบมาเหมาะสำหรับการเรียนรู้และการสอนการเขียนโปรแกรม Cytron มี Tutorials บทช่วยสอนที่มีคำแนะนำวิธีการติดตั้งและตัวอย่างการใช้งานอย่างละเอียด
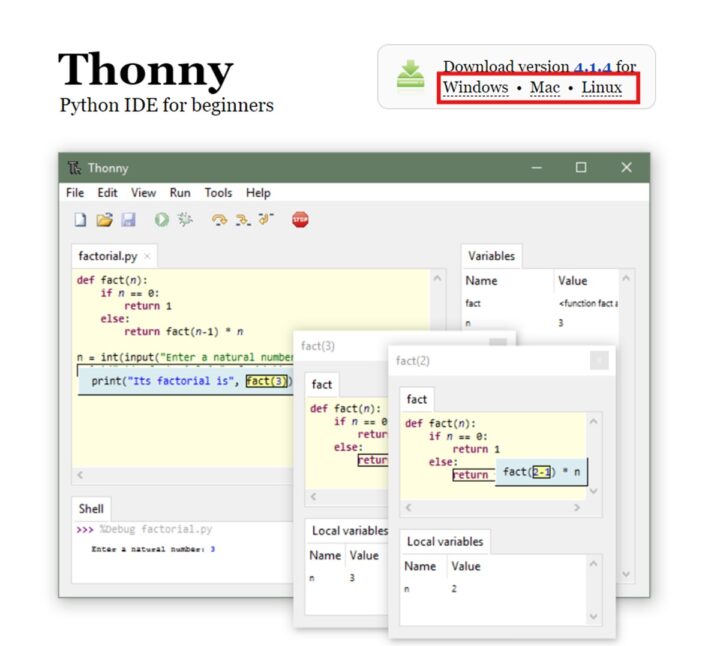
เริ่มด้วย Download โปรแกรม Thonny IDE จากเว็บ https://thonny.org/ แล้วกดติดตั้งโปรแกรม thonny-4.1.4.exe สำหรับ Windows
เมื่อเราการติดตั้งโปรแกรม Thonny IDE ทำการการเพิ่มบอร์ด Maker Uno RP2040 โดย…
- กดปุ่ม BOOT ค้างไว้ และกดปุ่ม RESET พร้อมกัน
- กดปุ่ม BOOT ค้างไว้จนกระทั่งเราจะเห็นไดรฟ์ RPI-RP2 แสดงขึ้นมา
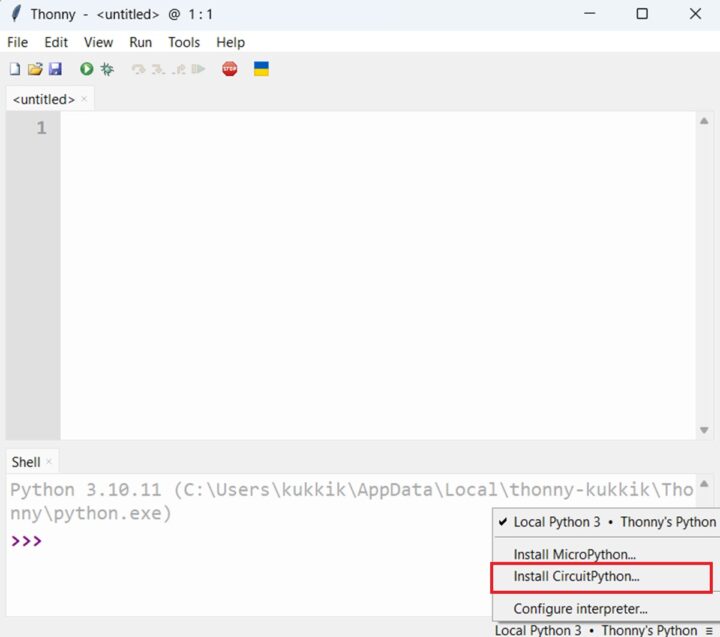
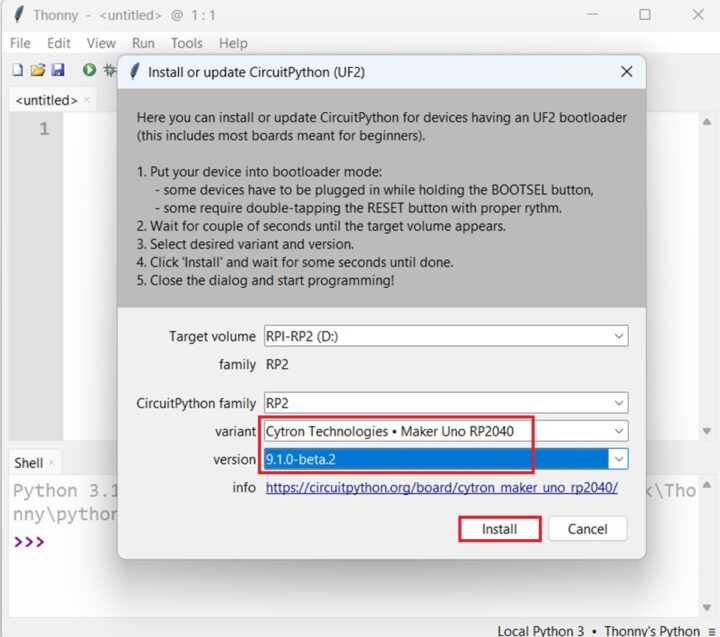
- เปิด Thonny IDE ที่มุมขวาล่าง เลือก ‘ติดตั้ง CircuitPython’ แล้วเลือกตัวเลือก CircuitPython ที่ถูกต้อง จากนั้นคลิก Install
- ตั้งค่าตามนี้
- เมื่อติดตั้งเรียบร้อยไดรฟ์ RPI-RP2 จะเปลี่ยนเป็น CIRCUITPY
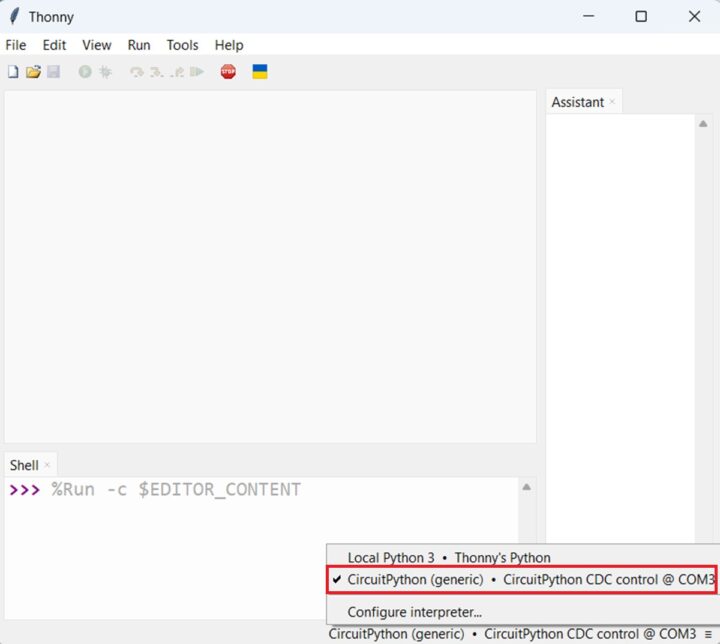
- เลือก CIRCUITPYTHON ตรงมุมล่างขวาของ Thonny
ต่อไปเราจะทดสอบการใช้งานกับบอร์ด
ทดสอบเขียนโปรแกรม Blink ไฟกระพริบ
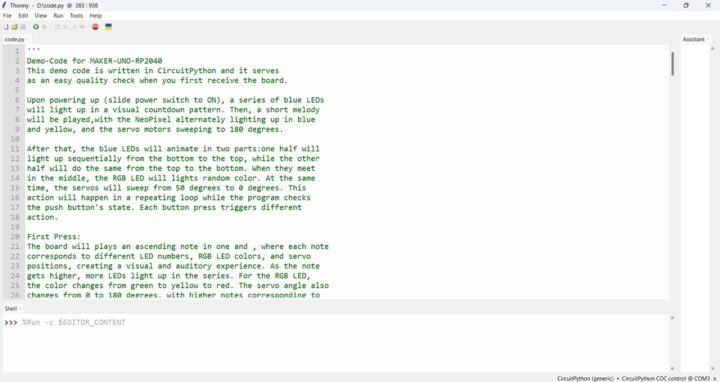
เปิดโปรแกรม thonny และ เลือกไฟล์ code.py ในไดรฟ์ของคุณ หรือเพียงแค่ ”open with’ code.py โดยใช้ Thonny IDE
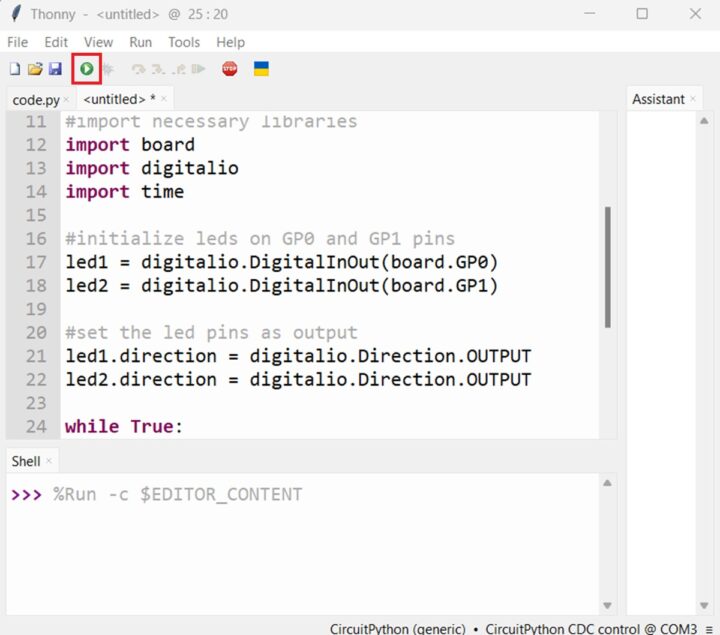
คัดลอกและวางโค้ดตามนี้
|
1 2 3 4 5 6 7 8 9 10 11 12 13 14 15 16 17 18 19 20 21 22 23 24 25 26 27 28 29 30 31 32 33 34 35 |
""" DESCRIPTION: This example code will use Maker Uno RP2040 to light up two onboard LED alternately. For this code, GPIO LEDs of the GP0 and GP1 are selected AUTHOR : Cytron Technologies Sdn Bhd WEBSITE : www.cytron.io EMAIL : [email protected] """ #import necessary libraries import board import digitalio import time #initialize leds on GP0 and GP1 pins led1 = digitalio.DigitalInOut(board.GP0) led2 = digitalio.DigitalInOut(board.GP1) #set the led pins as output led1.direction = digitalio.Direction.OUTPUT led2.direction = digitalio.Direction.OUTPUT while True: #led1 is light up for 0.5s then turned off led1.value = True time.sleep(0.5) led1.value = False time.sleep(0.5) #led2 is light up for 0.5s then turned off led2.value = True time.sleep(0.5) led2.value = False time.sleep(0.5) |
เมื่อตรวจสอบว่าโค้ดถูกต้องให้กดที่ run
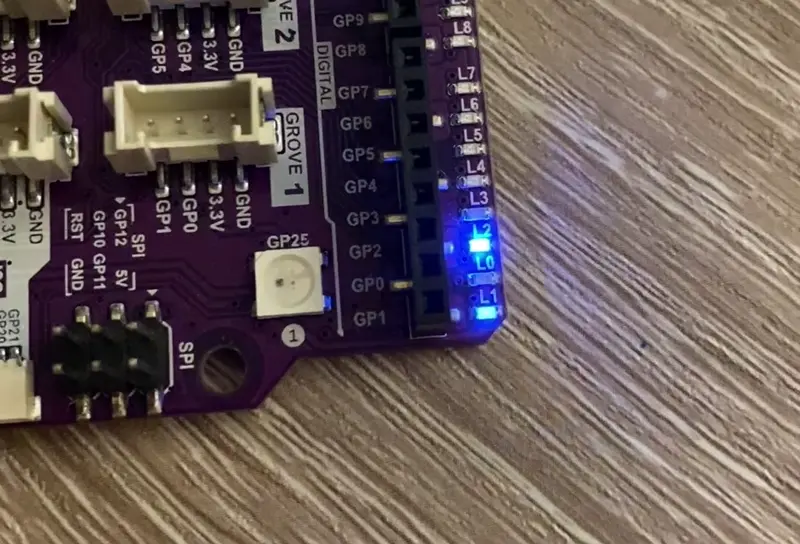
สิ่งที่ได้คือจะมี LED ไฟกะพริบบนบอร์ด 2 ดวง (GP0 และ GP1) สลับกันทุกๆ 0.5 วินาที
ทดสอบเขียนโปรแกรมไฟ LED แบบ RGB
เปิดโปรแกรม Thonny และ เลือกไฟล์ code.py ในไดรฟ์ของคุณ หรือเพียงแค่ ”open with’ code.py โดยใช้ Thonny IDE และคัดลอกและวางโค้ดตามนี้
|
1 2 3 4 5 6 7 8 9 10 11 12 13 14 15 16 17 18 19 20 21 22 23 24 25 26 27 28 29 30 |
""" DESCRIPTION: This example code will uses Maker UNO RP2040 to control the onboard WS2812 RGB LEDs AUTHOR : Cytron Technologies Sdn Bhd WEBSITE : www.cytron.io EMAIL : [email protected] """ #import necessary libraries import board import time import neopixel #add "neopixel" library into the "lib" folder # Initialize the 2 Neopixel RGB LEDs on pin GP25 pixels = neopixel.NeoPixel(board.GP25, 2) # Clear Neopixel RGB LED pixels.fill(0) # Set pixel brightness pixels.brightness = 0.5 while True: # Light up Neopixel RGB LED with red colour # The sequence of the colour code is (R,G,B) input range is from 0-255 (decimal) pixels.fill((200, 0, 0)) time.sleep(1) pixels.fill(0) time.sleep(1) |
เมื่อตรวจสอบว่าโค้ดถูกต้องให้กดที่ run สิ่งที่ได้คือ การกระพริบของ LED RGB บนบอร์ดมีสีแดงทั้งสองดวง โดยแต่ละดวงจะกะพริบทุกๆ 1 วินาที
และคุณจะสามารถควบคุมไฟ LED WS2812 RGB บนบอร์ดเปลี่ยนสีทั้งสองดวงมีสีเดียวกันและแยก โดยคัดลอกและวางโค้ดตามนี้
|
1 2 3 4 5 6 7 8 9 10 11 12 13 14 15 16 17 18 19 20 21 22 23 24 25 26 27 28 29 30 31 32 33 34 35 36 37 38 39 40 41 42 43 44 45 46 47 48 49 50 51 52 53 54 55 56 57 58 59 60 61 62 63 64 65 66 |
""" DESCRIPTION: This example code will uses Maker UNO RP2040 to control the onboard WS2812 RGB LEDs both individually and all together. The first LED will blink in various colors, followed by the second LED, and eventually, both LEDs will light up together. AUTHOR : Cytron Technologies Sdn Bhd WEBSITE : www.cytron.io EMAIL : [email protected] """ # Import necessary libraries import board import neopixel import time # Initialize Neopixel RGB LED on pin GP25 and declare the number LEDs pixel = neopixel.NeoPixel(board.GP25,2 ) # Clear Neopixel RGB LED pixel.fill(0) # Set pixel brightness pixel.brightness = 0.5 #set brightness to 50% # Define each colour codes in RGB decimal format RED = (255, 0, 0) ORANGE = (255,127,0) YELLOW = (255, 255, 0) GREEN = (0, 255, 0) BLUE = (0, 0, 255) INDIGO = (75, 0, 130) PURPLE = (148, 0, 211) WHITE = (100, 100, 100) # Group all the colours for each LED in an array colour1 = [RED,ORANGE,YELLOW,GREEN] colour2 = [BLUE,INDIGO,PURPLE,WHITE] # Create a combined list of colors for both LEDs colour_both = colour1 + colour2 while True: # Blink the first LED with multiple colors from colour1 array for i in colour1: pixel[0] = i # Turn on the first LED with the current color time.sleep(0.2) # Keep the color for 0.2 seconds pixel[0] = (0, 0, 0) # Turn off the first LED time.sleep(0.2) # Wait for 0.2 seconds # Blink the second LED with multiple colors colour1 array for i in colour2: pixel[1] = i # Turn on the second LED with the current color time.sleep(0.2) # Keep the color for 0.2seconds pixel[1] = (0, 0, 0) # Turn off the second LED time.sleep(0.2) # Wait for 0.2 seconds # Turn on both LEDs with white color pixel.fill(WHITE) time.sleep(2) # Keep both LEDs on for 2 seconds # Blink the all LEDs with multiple colors from the combined list of colour1 and colour2 for i in range(len(colour_both)): pixel.fill((colour_both)[i]) time.sleep(0.3) # Turn off all LEDs pixel.fill((0, 0, 0)) time.sleep(0.2) |
เมื่อตรวจสอบว่าโค้ดถูกต้องให้กดที่ run สิ่งที่ได้คือ การกระพริบของ LED RGB บนบอร์ดทั้งสองดวงเเปลี่ยนสีมีสีเดียวกันและแยก
ทดสอบเขียนโปรแกรมการควบคุม LED ด้วยกดปุ่ม USER
เปิดโปรแกรม Thonny และ เลือกไฟล์ code.py ในไดรฟ์ของคุณ หรือเพียงแค่ ”open with’ code.py โดยใช้ Thonny IDE ทำการคัดลอกและวางโค้ดตามนี้
|
1 2 3 4 5 6 7 8 9 10 11 12 13 14 15 16 17 18 19 20 21 22 23 24 25 26 27 28 29 30 31 32 33 34 35 36 37 38 39 40 41 42 |
""" DESCRIPTION: This example code uses Maker Uno RP2040 to control two LEDs with the onboard user button, turning one LED on and the other off simultaneously while the button is pressed. AUTHOR : Cytron Technologies Sdn Bhd WEBSITE : www.cytron.io EMAIL : [email protected] """ # Import necessary libraries import board import digitalio import time # Initialize LEDs on GP0 and GP1 pins led1 = digitalio.DigitalInOut(board.GP0) led2 = digitalio.DigitalInOut(board.GP1) # Set the LED pins as output led1.direction = digitalio.Direction.OUTPUT led2.direction = digitalio.Direction.OUTPUT # Initialize the onboard Maker UNO RP2040 user button (GP2) btn1 = digitalio.DigitalInOut(board.GP2) # Configure 'btn1' as an input with a pull-up resistor btn1.direction = digitalio.Direction.INPUT btn1.pull = digitalio.Pull.UP # Initially, turn on led1 and turn off led2 led1.value = True led2.value = False while True: if not btn1.value: # When the button is pressed, it turns off LED1 and turns on LED2 led1.value = False led2.value = True else: # If the button is not pressed, set LED1 to on and LED2 to off led1.value = True led2.value = False |
เมื่อตรวจสอบว่าโค้ดถูกต้องให้กดที่ run สิ่งที่ได้คือ กดปุ่ม USER 1 ครั้งจะทำให้ไฟ LED (GP0) ติดขึ้นเป็นเวลา 0.5 วินาทีแล้วจึงดับลง
และสามารถสลับของไฟ LED บนบอร์ด 2 ดวงในการกดปุ่ม USER แต่ละครั้ง โดยคัดลอกและวางโค้ดตามนี้
|
1 2 3 4 5 6 7 8 9 10 11 12 13 14 15 16 17 18 19 20 21 22 23 24 25 26 27 28 29 30 31 32 33 34 35 36 37 38 39 40 41 42 43 44 45 46 47 48 49 |
""" DESCRIPTION: This example code uses Maker Uno RP2040 to control two LEDs with the onboard user button. The initial state has LED1 on and LED2 off. Pressing the button toggles the state of both LEDs. AUTHOR : Cytron Technologies Sdn Bhd WEBSITE : www.cytron.io EMAIL : [email protected] """ # Import necessary libraries import board import digitalio import time # Initialize LEDs on GP0 and GP1 pins led1 = digitalio.DigitalInOut(board.GP0) led2 = digitalio.DigitalInOut(board.GP1) # Set the LED pins as output led1.direction = digitalio.Direction.OUTPUT led2.direction = digitalio.Direction.OUTPUT # Initialize button on GP2 btn1 = digitalio.DigitalInOut(board.GP2) btn1.direction = digitalio.Direction.INPUT btn1.pull = digitalio.Pull.UP # Initially, turn on LED1 and turn off LED2 led1.value = True led2.value = False # Track the previous state of the button (initially unpressed) # 'True' since the button is pulled up previous_btn_state = True while True: # Read the current state of the button current_btn_state = not btn1.value # Invert the value since it's pulled up # Check if the button state has changed (pressed or released) if current_btn_state != previous_btn_state: if current_btn_state: # Button is released # Toggle the state of LEDs led1.value = not led1.value led2.value = not led2.value # Update the previous button state for the next iteration previous_btn_state = current_btn_state |
เมื่อตรวจสอบว่าโค้ดถูกต้องให้กดที่ run สิ่งที่ได้คือไฟ LED GP0 กับ GP1 จะสลับกัน สลับ
ทดสอบเขียนโปรแกรมทำให้มีเสียง
เปิดโปรแกรม Thonny และ เลือกไฟล์ code.py ในไดรฟ์ของคุณ หรือเพียงแค่ ”open with’ code.py โดยใช้ Thonny IDE ทำการคัดลอกและวางโค้ดตามนี้
|
1 2 3 4 5 6 7 8 9 10 11 12 13 14 15 16 17 18 19 20 21 22 23 24 25 26 27 28 29 30 31 32 33 34 35 36 37 38 39 40 41 42 43 44 45 |
""" DESCRIPTION: This example code use Maker Uno RP2040 and the simpleio library to play tones from a buzzer. A push button also used to play specific musical notes through the buzzer. AUTHOR : Cytron Technologies Sdn Bhd WEBSITE : www.cytron.io EMAIL : [email protected] """ #Import necessary libraries import board import digitalio import time import simpleio # Add the 'simpleio' library to the 'lib' folder # Define the melody notes with their respective durations MELODY_NOTE = [659, 659, 0, 659, 0, 523, 659, 0, 784] # [E5, E5, REST, E5, REST, C5, E5, REST, G5] MELODY_DURATION = [0.15, 0.15, 0.15, 0.15, 0.15, 0.15, 0.15, 0.15, 0.2] # Define pin connected to piezo buzzer PIEZO_PIN = board.BUZZER #or board.GP8 #Initialize buttons btn = digitalio.DigitalInOut(board.GP2) btn.direction = digitalio.Direction.INPUT btn.pull = digitalio.Pull.UP # Play melody during start up for i in range(len(MELODY_DURATION)): #The boad will not work with 0 frequency, so everytime the frequency is 0, it will rest for a duration of time if MELODY_NOTE[i] == 0: time.sleep(MELODY_DURATION[i]) else: # Play melody tones simpleio.tone(PIEZO_PIN, MELODY_NOTE[i], duration=MELODY_DURATION[i]) while True: # Check if button (GP2) is pressed if not btn.value: # Play tones # Format(pin,frequency,duration) simpleio.tone(PIEZO_PIN, 262, duration=0.1) simpleio.tone(PIEZO_PIN, 659, duration=0.15) simpleio.tone(PIEZO_PIN, 784, duration=0.2) |
เมื่อตรวจสอบว่าโค้ดถูกต้องให้กดที่ run สิ่งที่ได้คือ เมื่อกดปุ่ม USER จะมีบอร์ดจะเล่นเมโลดี้
ทดสอบเขียนโปรแกรมกับ Micro Servo Motor
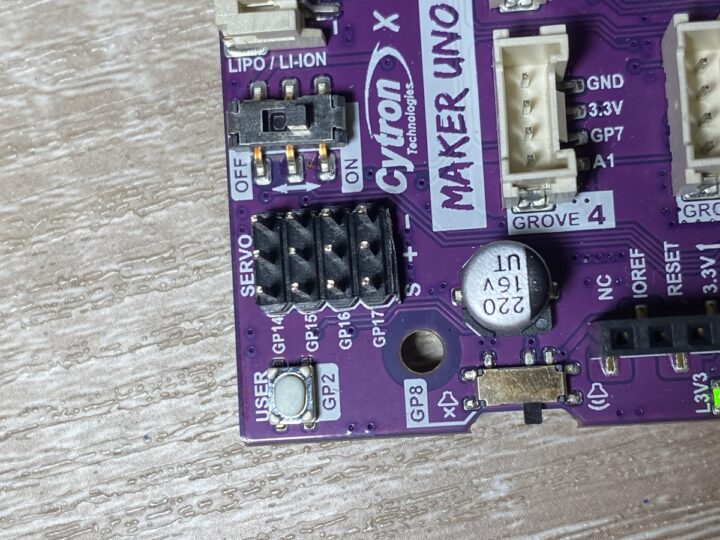
วิธีการใช้และควบคุมไมโครเซอร์โวที่เชื่อมต่อกับพอร์ตเซอร์โวของ Maker Uno RP2040 พินสัญญาณของพอร์ตเซอร์โวออนบอร์ดคือ GP14, GP15, GP16 และ GP17 แรงดันไฟฟ้าของเซอร์โว
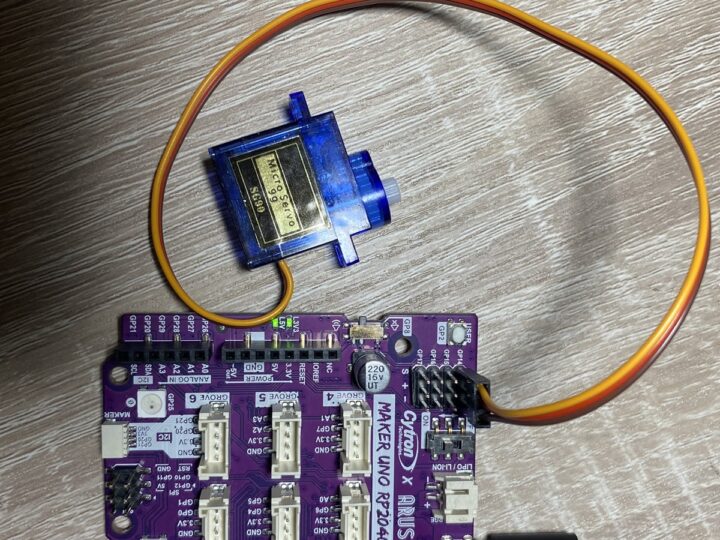
เชื่อมต่อไมโครเซอร์โวมอเตอร์เข้ากับพอร์ตเซอร์โวพอร์ตใดพอร์ตหนึ่ง ตัวอย่างเช่น คุณสามารถเชื่อมต่อ Micro Servo SG90 เข้ากับพอร์ต S1 บน Maker Uno RP2040
เปิดโปรแกรม Thonny และ เลือกไฟล์ code.py ในไดรฟ์ของคุณ หรือเพียงแค่ ”open with’ code.py โดยใช้ Thonny IDE ทำการคัดลอกและวางโค้ดตามนี้
|
1 2 3 4 5 6 7 8 9 10 11 12 13 14 15 16 17 18 19 20 21 22 23 24 25 26 27 28 29 30 31 32 33 34 35 36 37 38 39 40 41 42 43 44 45 46 47 48 49 50 51 52 53 54 55 |
""" DESCRIPTION: This example code will use Maker Uno RP2040 to controll four servo motors that are connected to the onboard servo port. The servo motors will rotate through the sequence: 0°, 180°, 90°, and back to 0° degrees in a continuous loop. AUTHOR : Cytron Technologies Sdn Bhd WEBSITE : www.cytron.io EMAIL : [email protected] """ import time import board import digitalio import pwmio from adafruit_motor import servo # Create PWMOut objects for the servo pins pwm1 = pwmio.PWMOut(board.GP14, duty_cycle=0, frequency=50) pwm2 = pwmio.PWMOut(board.GP15, duty_cycle=0, frequency=50) pwm3 = pwmio.PWMOut(board.GP16, duty_cycle=0, frequency=50) pwm4 = pwmio.PWMOut(board.GP17, duty_cycle=0, frequency=50) # Initialize Servo objects. # A servo might need to be calibrated to get an accurate servo angle. # Create a Servo object with a min_pulse and max_pulse to calibrated the angle. # min_pulse should be where the 0° starts while max_pulse should be where 180° stops. # The pulse range is 750 - 2250 by default (if not defined). servo1 = servo.Servo(pwm1, min_pulse=580, max_pulse=2700) servo2 = servo.Servo(pwm2, min_pulse=580, max_pulse=2700) servo3 = servo.Servo(pwm3, min_pulse=580, max_pulse=2700) servo4 = servo.Servo(pwm4, min_pulse=580, max_pulse=2700) angle = 0 while True: #Set servo angle angle = 180 # Update servo angles. servo1.angle = servo2.angle = servo3.angle = servo4.angle = angle # Change the angle every 1 second. time.sleep(1) #Set servo angle angle = 90 # Update servo angles. servo1.angle = servo2.angle = servo3.angle = servo4.angle = angle # Change the angle every 1 second. time.sleep(1) #Set servo angle angle = 0 # Update servo angles. servo1.angle = servo2.angle = servo3.angle = servo4.angle = angle # Change the angle every 1 second. time.sleep(1) |
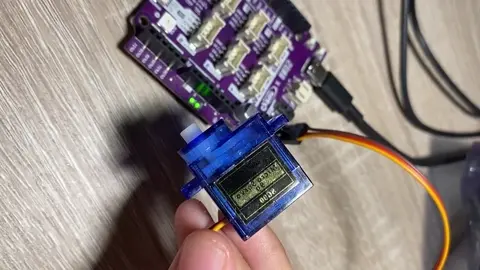
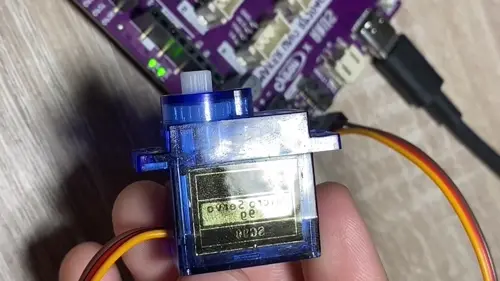
เมื่อตรวจสอบว่าโค้ดถูกต้องให้กดที่ run สิ่งที่ได้คือ หมุนผ่านลำดับมุม 0°, 180°, 90° และกลับไปที่ 0° องศาในลูปอย่างต่อเนื่อง
หรือเราสามารถปรับความเร็วได้โดยการปรับเวลาพักระหว่างแต่ละมุม ทำการคัดลอกและวางโค้ดตามนี้ สิ่งที่ได้คือ
|
1 2 3 4 5 6 7 8 9 10 11 12 13 14 15 16 17 18 19 20 21 22 23 24 25 26 27 28 29 30 31 32 33 34 35 36 37 38 39 40 41 42 43 44 45 46 47 48 49 50 51 52 53 54 55 56 57 58 59 60 |
""" DESCRIPTION: This example code will use Maker Uno RP2040 to control four servo motors that are connected to the onboard servo port. In this code, we will manipulate the sweeping speed of the servo motors. AUTHOR : Cytron Technologies Sdn Bhd WEBSITE : www.cytron.io EMAIL : [email protected] """ import time import board import digitalio import pwmio from adafruit_motor import servo # create a PWMOut object on the control pin. pwm1 = pwmio.PWMOut(board.GP14, duty_cycle=0, frequency=50) pwm2 = pwmio.PWMOut(board.GP15, duty_cycle=0, frequency=50) pwm3 = pwmio.PWMOut(board.GP16, duty_cycle=0, frequency=50) pwm4 = pwmio.PWMOut(board.GP17, duty_cycle=0, frequency=50) # Initialize Servo objects. # A servo might need to be calibrated to get an accurate servo angle. # Create a Servo object with a min_pulse and max_pulse to calibrated the angle. # min_pulse should be where the 0° starts while max_pulse should be where 180° stops. # The pulse range is 750 - 2250 by default (if not defined). servo1 = servo.Servo(pwm1, min_pulse=580, max_pulse=2700) servo2 = servo.Servo(pwm2, min_pulse=580, max_pulse=2700) servo3 = servo.Servo(pwm3, min_pulse=580, max_pulse=2700) servo4 = servo.Servo(pwm4, min_pulse=580, max_pulse=2700) angle = 0 while True: # Reduce the sleep time between each angle increment to increase sweep speed. for angle in range(0, 180, 5): servo1.angle = angle time.sleep(0.05) time.sleep(0.5) for angle in range(0, 180, 5): servo2.angle = angle time.sleep(0.03) time.sleep(0.5) for angle in range(0, 180, 5): servo3.angle = angle time.sleep(0.02) time.sleep(0.5) for angle in range(0, 180, 5): servo4.angle = angle time.sleep(0.01) time.sleep(0.5) |
เมื่อตรวจสอบว่าโค้ดถูกต้องให้กดที่ run สิ่งที่ได้คือ เซอร์โวมอเตอร์จะหมุนจาก 0° ถึง 180° โดยมีการเพิ่มมุมทีละ 5° แต่ละตัวจะหมุนด้วยความเร็วที่ต่างกัน หลังจากเซอร์โวมอเตอร์แต่ละตัวหมุนถึง 180° แล้วจะรอ 0.5 วินาทีก่อนจะเริ่มหมุนตัวถัดไป
ทดสอบเขียนโปรแกรมอ่านค่าเซนเซอร์ด้วย Maker Soil Module และ HC-SR04 Ultrasonic Sensor
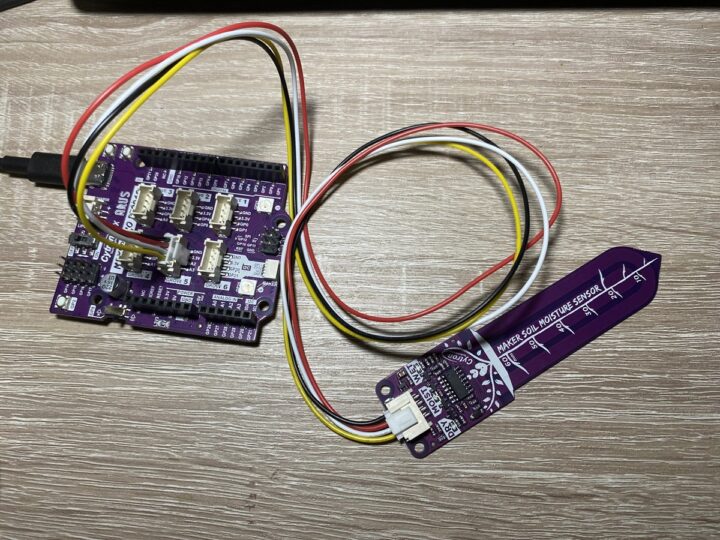
โดยเชื่อมต่อโมดูลเซนเซอร์ของคุณเข้ากับพอร์ต Grove ของ Maker Uno เราจะใช้ Maker Soil และเชื่อมต่อกับพอร์ต Grove 5 ของ Maker Uno RP2040
เปิดโปรแกรม Thonny และ เลือกไฟล์ code.py ในไดรฟ์ของคุณ หรือเพียงแค่ ”open with’ code.py โดยใช้ Thonny IDE ทำการคัดลอกและวางโค้ดตามนี้
|
1 2 3 4 5 6 7 8 9 10 11 12 13 14 15 16 17 18 19 20 21 22 23 24 25 26 27 28 29 30 31 32 |
""" DESCRIPTION: This example code will use Maker Uno RP2040 to read analog value from Maker Soil Module and display the reading in the REPL panel. This code applicable to any analog sensor. CONNECTION: Grove 5 of Maker Uno RP2040 : Maker Soil Module GP29 - OUT pin of the Maker Soil Module AUTHOR : Cytron Technologies Sdn Bhd WEBSITE : www.cytron.io EMAIL : [email protected] """ #Import necessary libraries import board import time import analogio #Define analog pin GP29 used on the board sensor = analogio.AnalogIn(board.GP29) while True: #Serial print the sensor value every 1 second raw_value = sensor.value voltage_value = (raw_value * 3.3) / 65536 print('Raw Value : ', raw_value) print('Voltage Value : ', voltage_value) print('-------------------------') time.sleep(1) |
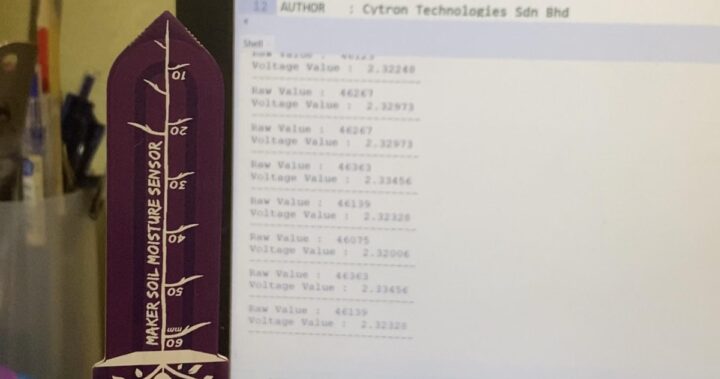
เมื่อรวจสอบว่าโค้ดถูกต้องให้กดที่ run อ่านค่าจาก Maker Soil Module (หรือเซนเซอร์อะนาล็อกอื่นๆ) และแสดงผลการอ่านค่าใน REPL panel ทุก ๆ 1 วินาที
ทดสอบความชื้นในอากาศ
แสดงค่าความชื้นเป็น 2.334456
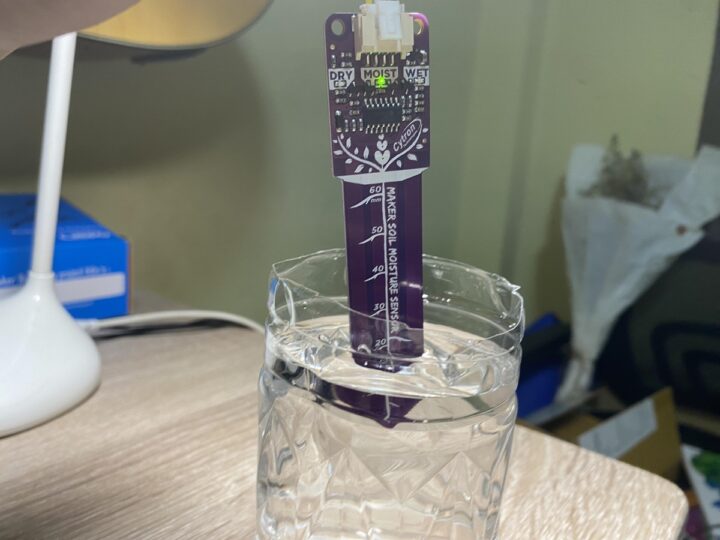
ทดสอบความชื้นที่ผิวน้ำ
แสดงค่าความชื้นเป็น 1.96224
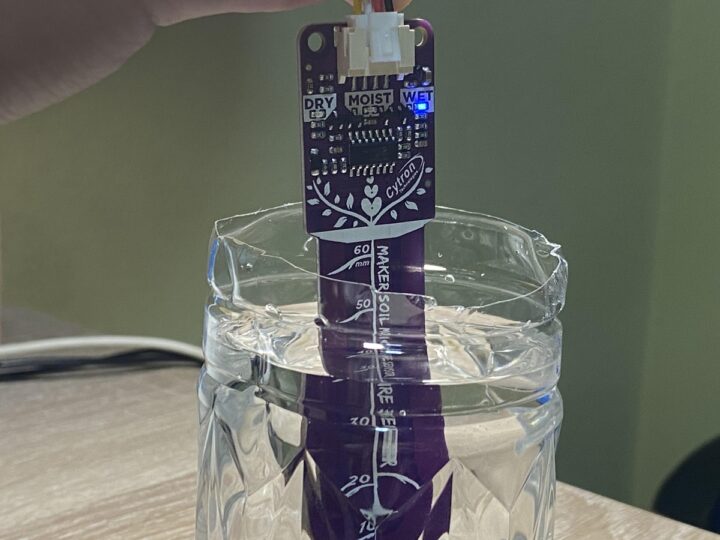
ทดสอบความชื้นที่จุ่มน้ำ
แสดงค่าความชื้นเป็น 1.55528
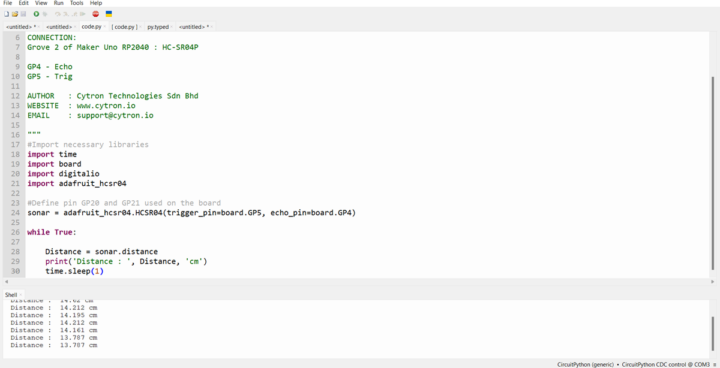
เริ่มจากเชื่อมต่อเซ็นเซอร์อัลตราโซนิกเข้ากับพอร์ต Grove 2 ของ Maker Uno RP2040 ผ่านสายเคเบิล Grove ถึง 4 female โดยเซนเซอร์ Ultrasonic HC-SR04P ในการอ่านและวัดระยะทาง และแสดงผลระยะทางใน REPL (Read-Eval-Print Loop)
เปิดโปรแกรม Thonny และ เลือกไฟล์ code.py ในไดรฟ์ของคุณ หรือเพียงแค่ ”open with’ code.py โดยใช้ Thonny IDE ทำการคัดลอกและวางโค้ดตามนี้
|
1 2 3 4 5 6 7 8 9 10 11 12 13 14 15 16 17 18 19 20 21 22 23 24 25 26 27 28 29 30 |
""" DESCRIPTION: This example code will uses Maker Uno RP2040 with Ultrasonic Sensor HC-SR04P to read, measure and display distance in the REPL to read distance from Ultrasonic Sensor HC-SR04P. CONNECTION: Grove 2 of Maker Uno RP2040 : HC-SR04P GP4 - Echo GP5 - Trig AUTHOR : Cytron Technologies Sdn Bhd WEBSITE : www.cytron.io EMAIL : [email protected] """ #Import necessary libraries import time import board import digitalio import adafruit_hcsr04 #Define pin GP20 and GP21 used on the board sonar = adafruit_hcsr04.HCSR04(trigger_pin=board.GP4, echo_pin=board.GP5) while True: Distance = sonar.distance print('Distance : ', Distance, 'cm') time.sleep(1) |
เมื่อตรวจสอบว่าโค้ดถูกต้องให้กดที่ จะขึ้นดังนี้
โดยแสดงค่าระยะห่างจากกล่อง 13 – 14 cm
สรุป
Maker Uno RP2040 เริ่มต้นใช้งานบน Thonny IDE ด้วย CircuitPython ระดับสำหรับเริ่มต้น ซึ่งออกแบบมาเหมาะสำหรับการเรียนรู้และการสอนการเขียนโปรแกรม ทดสอบการเขียนโปรแกรม Blink ไฟกระพริบ, ไฟ LED แบบ RGB, กดปุ่มไฟติด, buzzer ทำให้มีเสียง, ใช้งานร่วมกับ Micro Servo Motor เพื่อทดสอบการหมุนของเซอร์โวมอเตอร์, การอ่านค่าเซนเซอร์ด้วย Maker Soil Module วัดความชื้นในอากาศ ผิวน้ำ และความชื้นที่จุ่มน้ำ, การอ่านค่าเซนเซอร์วัดระยะห่างวัดถุด้วยโมดูลเซนเซอร์ Ultrasonic HC-SR04 สามารถนำไปใช้งานได้ง่าย สะดวก ไม่ซับซ้อนพร้อมมี Tutorials บทช่วยสอนที่มีคำแนะนำวิธีการติดตั้งและตัวอย่างการใช้งานอย่างละเอียด เหมาะสำหรับเหมาะสำหรับผู้เริ่มต้นใช้งานในการศึกษา ไม่เพียงเท่านั้นคุณยังสามารถนำไปต่อยอด ใช้บอร์ดร่วมกับอุปกรณ์เสริมที่มีประโยชน์อื่นๆ เพื่อยกระดับประสบการณ์การเรียนรู้และจุดประกายความคิดสร้างสรรค์ในระดับสูงต่อไปได้
ขอขอบคุณ Cytron ที่ส่งชุด Maker Uno RP2040 kid มาให้เราได้ทำการรีวิว สามารถซื้อบอร์ด Maker Uno RP2040 ราคาประมาณ 500฿, Maker Soil Moisture Sensor ราคา 160฿, HC-SR04 Ultrasonic Sensor ราคาประมาณ 30฿, SG90 Micro Servo ราคา 58฿, OLED I2C 0.96Inch 128×64 Blue Display ราคา 190฿ บนเว็ปไซด์ของ Cytron (Thailand)

มีความสนใจด้านเทคโนโลยีคอมพิวเตอร์ เเละ กำลังศึกษาเกี่ยวกับเทคโนโลยีคอมพิวเตอร์ หุ่นยนต์ เเละ ปัญญาประดิษฐ์

