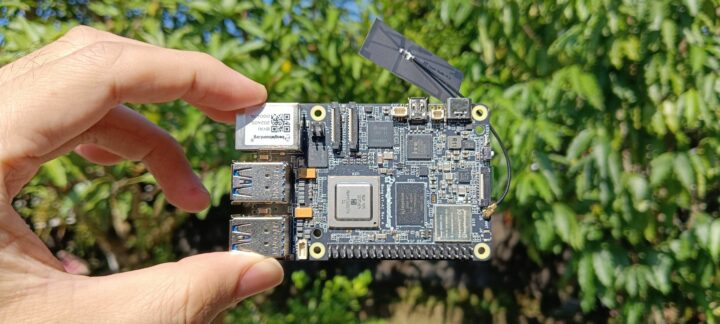
BeagleY-AI เป็นคอมพิวเตอร์บอร์ดเดี่ยว (single board computer : SBC) แบบ open-source ของ BeagleBoard.org โดยบอร์ด BeagleY-AI นี้ถูกออกแบบมาเพื่อการประยุกต์ด้านปัญญาประดิษฐ์ โดยมีหน่วยประมวลผลหลักคือ ARM Coretex-A53 จำนวน 4 แกน ทำงานที่ความเร็ว 1.4 GHz นอกจากนั้นยังมี ARM Cortex-R5F ทำงานที่ความเร็ว 800MHz สำหรับการใช้งานทั่วไป รวมไปถึงการใช้งานกับ I/O แบบ low-lentency มี C7x DSP จำนวน 2 หน่วย พร้อมด้วย Multiply Accelertor (MMA) ที่ช่วยด้านการคำนวณปัญญาประดิษฐ์และเร่งความเร็วการคำนวณ Deel Learning โดย C7XDSP แต่ละหน่วยจะทำงานที่ความเร็ว 2 TOPs รวมสูงสุด 4 TOPS รวมทั้งยังมาพร้อมกับ BXS-4-64 ซึ่งเป็นหน่วยเร่งความเร็วกราฟิกส์ความเร็ว 50 GFlops สำหรับงานมัลติมีเดีย เช่น การเข้ารหัสและการถอดรหัสวิดีโอ สำหรับผู้ที่สนใจก็สามารถอ่านรายละเอียดอื่น ๆ เพิ่มเติมได้จากการบทความของ CNX-Software และทางเว็บไซต์ของผู้ผลิตครับ
เปิดกล่อง
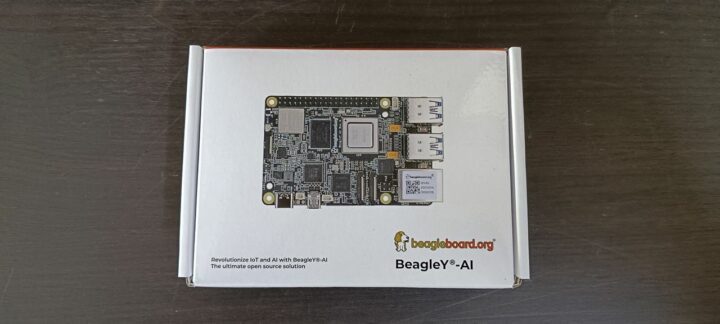
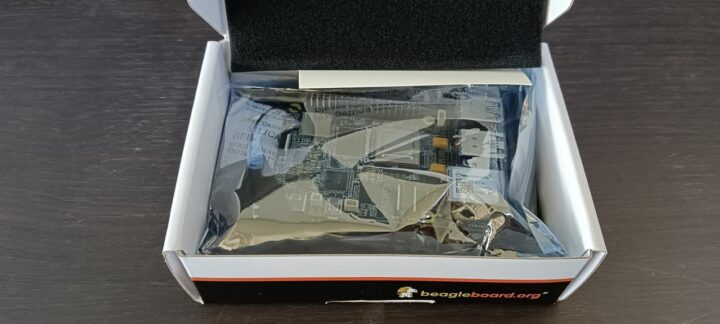
BeagleY-AI ที่ส่งมาให้ผมทดลองครั้งนี้ต้นทางส่งมาจากอินเดีย ตัวกล่องบรรจุเป็นกล่องกระดาษลูกฟูกสกรีนเคลือบเงา ภายในกล่องมีการใส่ฟองน้ำกันกระแทกมาให้ และตัวบอร์ด BeagleY-AI เองนั้นใส่มาในซองพลาสติกอีกชั้นหนึ่ง ตัวบอร์ดมีสายอากาศติดมาให้เรียบร้อยแล้ว ไม่มีอุปกรณ์นอกจากนี้ครับ
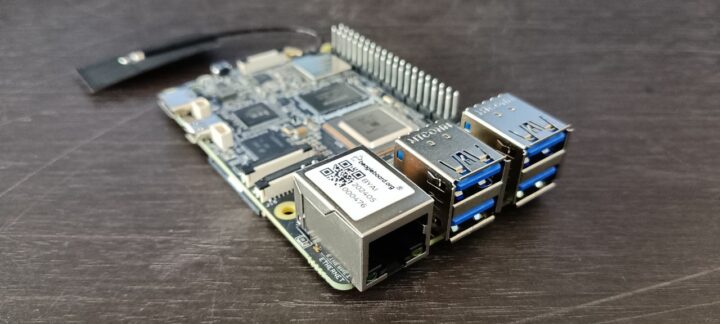
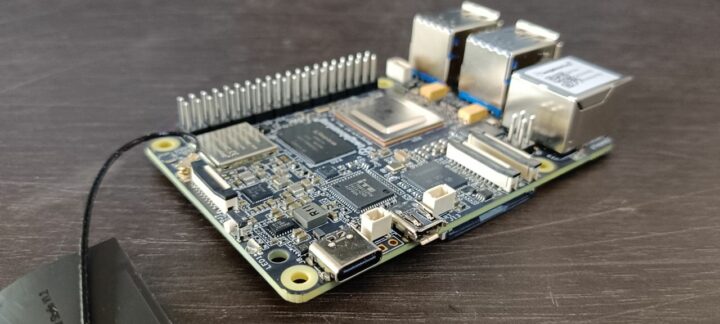
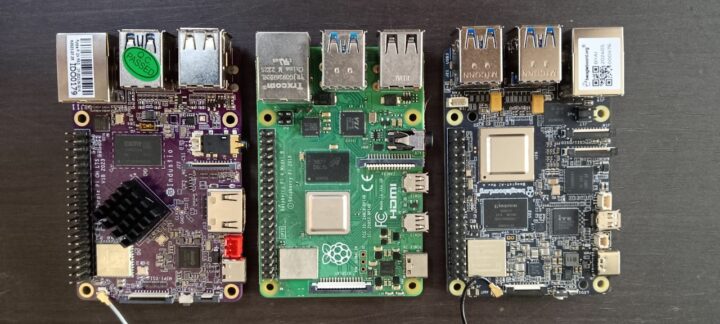
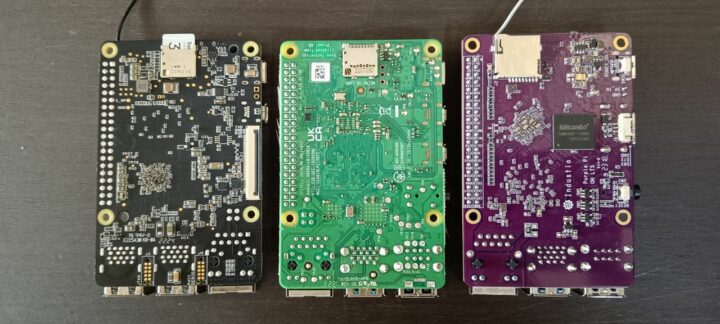
ผมถ่ายภาพของบอร์ดที่มีผมมีอยู่ที่มี form factor เดียวกันมาให้เปรียบเทียบดูตามภาพด้านล่างนี้ โดยบอร์ดที่ผมมีประกอบด้วย Purple Pi OH, Raspberry Pi 4 Model B, และ BeagleY-AI ครับ
การติดตั้ง
ผมติดตั้งระบบปฏิบัติการด้วยการทำตามรายละเอียดในเอกสาร BeagleY-AI Quick Start ซึ่งขั้นตอนที่สำคัญก็จะคล้ายกับการเตรียม RP4 หรือ SBC ทั่ว ๆ ไป นั่นก็คือผมต้องเตรียม SD Card เพื่อการลง Image ของระบบปฏิบัติการ โดยผู้ผลิตแนะนำให้ใช้ MicroSD Card ขนาด 32 กิกะไบต์ ในการรีวิวนี้ผมใช้ MicroSD Card ของ SanDisk ขนาด 32 กิกะไบต์
ผู้ผลิตแนะนำการ flash ด้วยโปรแกรม bb-imager หรือไม่ก็ Balena Etcher แต่ว่าหลังจากดาวน์โหลด bb-imager มาแล้วผมพบว่าโปรแกรมไม่รันบนคอมพิวเตอร์ของผม (Windows 10) ผมจึงทดลองใหม่ด้วยโปรแกรม Balena Etcher ซึ่งสามารถ flash ได้โดยไม่มีปัญหาอะไร สำหรับขั้นตอนคร่าว ๆ ของการใช้ Balena Etcher เพื่อ flash ระบบปฏิบัติการของ BeagleY-AI ก็จะประกอบด้วยการดาวน์โหลด OS Image ที่ผู้ผลิตเตรียมไว้ให้จาก https://www.beagleboard.org/distros/beagley-ai-debian-12-5-2024-06-19-xfce ซึ่ง Image file ที่ผมเลือกมีขนาดประมาณ 1.4 กิกะไบต์ เมื่อดาวน์โหลดเสร็จแล้วจึงขยายไฟล์จากไฟล์ .xz เป็นไฟล์ .img รอไว้ เสร็จแล้วผมเปิดโปรแกรม Balena Etcher แล้วเลือกไฟล์ img ที่เตรียมไว้แล้วกดปุ่ม Flash! ซึ่งผมรอการติดตั้งประมาณ 10 นาทีและรอการ validate อีกประมาณ 10 นาทีก็เสร็จเรียบร้อยครับ
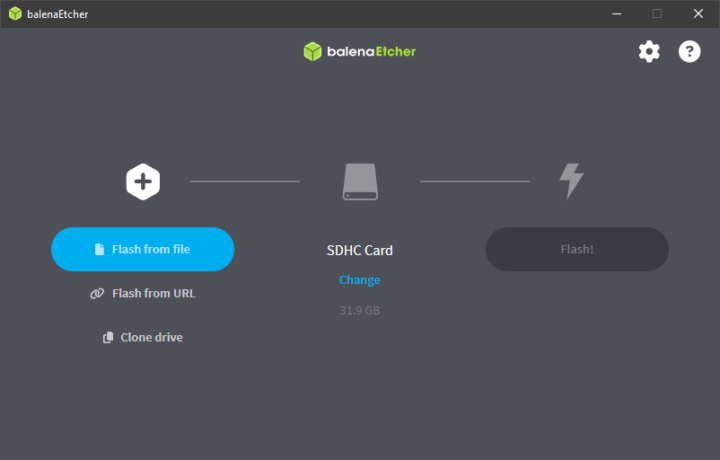
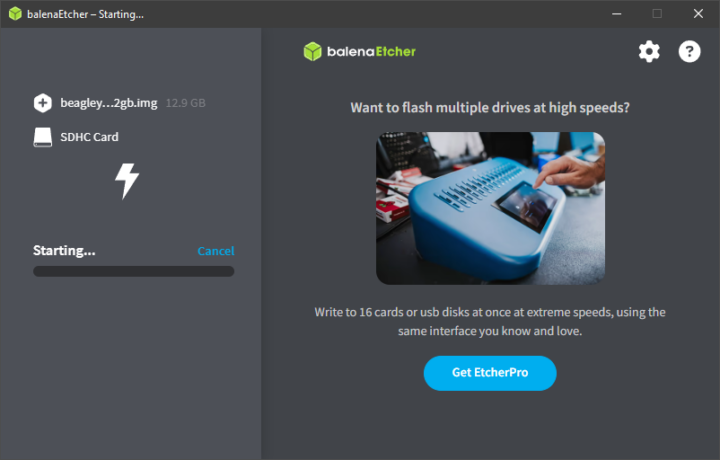
หลังจากนั้นผมก็แก้ไขชื่อผู้ใช้และรหัสผ่านของการเข้าใช้ระบบปฏิบัติการด้วยการเปิดไฟล์ sysconf.txt จากพาร์ติชัน BOOT แล้วค้นหาและแก้ไขข้อมูล user_name และ user_password ตามบรรทัดตัวอย่างด้านล่างนี้ให้เป็นข้อมูลที่เราต้องการ เสร็จแล้วบันทึกและนำการ์ดไปเสียบในบอร์ดก็พร้อมใช้งานครับ
|
1 2 3 4 |
# user_name - Set a user name for the user (1000) user_name=beagle # user_password - Set a password for user (1000) user_password=FooBar |
การใช้งานครั้งแรก
ผู้ผลิตแนะนำการใช้งานบอร์ด BeagleY-AI 3 แบบ คือ USB Tethering โดยตรงผ่านสาย USB Type-C, Headless connection ผ่านทาง UART port, และ Standalone connection ที่ต้องใช้จอ เมาส์และคีย์บอร์ด โดยผู้ผลิตแนะนำว่าแหล่งจ่ายไฟที่จ่ายให้บอร์ดที่ต่ออุปกรณ์พ่วงเช่นพัดลมระบายความร้อนหรือว่าจะใช้งานหนัก ๆ นั้นควรจะเป็นแหล่งจ่ายไฟแบบ 5V ที่จ่ายกระแสได้อย่างน้อย 3A หรือถ้าต้องการใช้สาย USB Type-C เป็น Type-C นั้นก็ควรรองรับกระแสอย่างน้อย 1000mA สำหรับการรีวิวนี้ผมทดลองแบบ USB Tethering และ Standalone connection ตามรายละเอียดด้านล่างนี้ครับ
ทดลองใช้งานด้วยวิธี USB Tethering
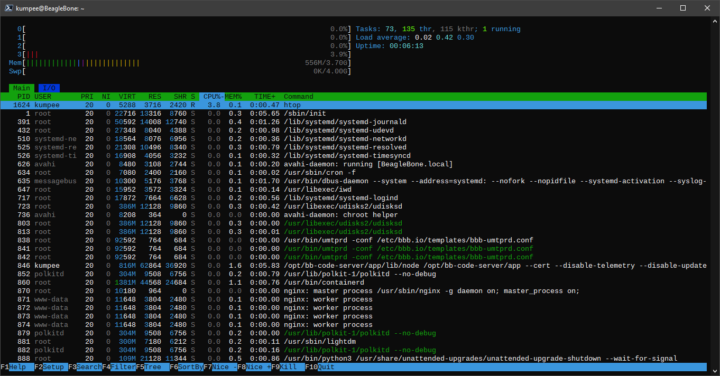
ผมได้ทดลองเสียบบอร์ด BeagleY-AI เข้ากับคอมพิวเตอร์ของผม เมื่อบอร์ดเริ่มทำงานผมพบว่าไฟสีแดงบนบอร์ดติดค้าง แล้วสักครู่หนึ่งก็จะเปลี่ยนเป็นสีเขียวกะพริบสั้น 2 ครั้งช้า กะพริบ 2 ครั้งเร็ว ซึ่งเป็นสัญญาณว่าบอร์ด BeagleY-AI ทำงานแล้ว เมื่อบอร์ดเตรียมการทำงานเรียบร้อยแล้ว ผมก็สามารถเชื่อมต่อกับ BeagleY-AI ได้ด้วย SSH ผ่านทาง Virtual Wired ที่บอร์ดสร้างให้ ซึ่งของผมได้มาเป็น Ethernet 2 หลังจากนั้นผมจึงทดลองเปิด Windows Power Shell แล้วเชื่อมต่อกับบอร์ดด้วย SSH โดยใช้ username และ pwd ที่ตั้งไว้เมื่อก่อนหน้านี้ ผมพบว่าสามารถเชื่อมต่อไปที่ BeagleY-AI ได้ทันที ภาพด้านล่างนี้เป็นตัวอย่างผลการรัน htop จากการเชื่อมต่อแบบ USB Tethering ครับ
ทดลองใช้งานด้วยวิธี Standalone connection
การทดลองนี้ ผมต้องต่อ BeagleY-AI เข้ากับอุปกรณ์อื่น ๆ ภายนอก โดยผมใช้สาย micro HDMI to full-size HDMI ต่อกับจอ BenQ EL2870U และใช้คีย์บอร์ดและเมาส์ของ Logitech แบบไร้สาย รวมทั้งต่อสาย LAN รอไว้ด้วย เสร็จแล้วผมจึงจ่ายไฟให้บอร์ดโดยใช้ power adaptor ของสมาร์ทโฟนของผมที่จ่ายไฟ 5V 3A และทันทีที่จ่ายไฟระบบก็เริ่มทำงาน หลังจากใช้เวลาสักครู่ระบบก็พร้อมใช้งาน
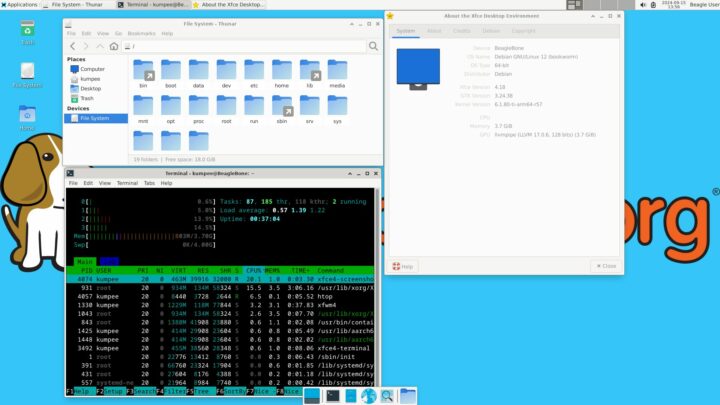
สำหรับการใช้งานอินเทอร์เน็ตด้วย Ethernet นั้นผมสามารถใช้งานได้ทันที ส่วนการใช้งาน Wi-Fi นั้น ผมต้องเปิดการใช้งาน NetworkManager และ start service ให้เรียบร้อยก่อน หลังจากนั้นจึงรัน nmtui เพื่อตั้งค่า Wi-Fi ซึ่งก็ทำได้โดยไม่พบปัญหาใด ๆ
ตรวจสอบบอร์ด
ตรวจสอบฮาร์ดแวร์ด้วยคำสั่ง inxi
ผมติดตั้ง inxi เพิ่มด้วยคำสั่ง sudo apt install inxi แล้วรันก็ได้พบว่า inxi ตรวจพบ CPU เป็น Cortex-A53 4 แกน ตรงตามที่ควรจะเป็น ส่วนรายละเอียดอื่น ๆ ก็มีตามข้อมูลด้านล่างนี้ครับ
|
1 2 3 4 5 6 7 8 9 10 11 12 13 14 15 16 17 18 19 20 21 22 23 24 25 26 27 28 29 30 31 32 33 34 35 36 37 38 39 40 41 42 43 44 45 46 |
System: Host: BeagleBone Kernel: 6.1.80-ti-arm64-r57 arch: aarch64 bits: 64 Desktop: Xfce v: 4.18.1 Distro: Debian GNU/Linux 12 (bookworm) Machine: Type: ARM System: BeagleBoard.org BeagleY-AI details: N/A CPU: Info: quad core model: N/A variant: cortex-a53 bits: 64 type: MCP cache: L2: 512 KiB Speed: N/A min/max: N/A cores: No per core speed data found. Graphics: Device-1: hdmi-connector driver: display_connector v: N/A Device-2: am62p-pvr driver: N/A Device-3: am62p-pvr driver: N/A Display: x11 server: X.Org v: 1.21.1.7 driver: X: loaded: N/A unloaded: fbdev,modesetting dri: swrast gpu: display_connector note: X driver n/a resolution: 1920x1080~60Hz API: OpenGL v: 4.5 Mesa 24.1.1-1bbbio0~bookworm+20240610 renderer: llvmpipe (LLVM 17.0.6 128 bits) Audio: Device-1: hdmi-connector driver: display_connector Device-2: simple-audio-card driver: asoc_simple_card API: ALSA v: k6.1.80-ti-arm64-r57 status: kernel-api Server-1: PipeWire v: 1.0.5 status: active Network: Message: No ARM data found for this feature. IF-ID-1: docker0 state: down mac: 02:42:4e:4c:31:c4 IF-ID-2: dummy0 state: down mac: 52:72:fb:6c:55:41 IF-ID-3: eth0 state: down mac: c0:d6:0a:f9:cd:c2 IF-ID-4: usb0 state: down mac: 1c:ba:8c:a2:ed:6b IF-ID-5: usb1 state: down mac: 1c:ba:8c:a2:ed:6d IF-ID-6: wlan0 state: up mac: 10:ca:bf:d8:28:4e Drives: Local Storage: total: 29.72 GiB used: 6.64 GiB (22.3%) ID-1: /dev/mmcblk1 vendor: Smart Modular Tech. model: SH32G size: 29.72 GiB Partition: ID-1: / size: 24.97 GiB used: 6.59 GiB (26.4%) fs: ext4 dev: /dev/mmcblk1p3 Swap: ID-1: swap-1 type: partition size: 4 GiB used: 0 KiB (0.0%) dev: /dev/mmcblk1p2 Sensors: System Temperatures: cpu: N/A mobo: N/A Fan Speeds (RPM): cpu: 0 Info: Processes: 224 Uptime: 58m Memory: 3.7 GiB used: 1.96 GiB (52.8%) Shell: Bash inxi: 3.3.26 |
ทดสอบประสิทธิภาพด้วย sbc-bench
ผมทดสอบทดสอบประสิทธิภาพของบอร์ด BeagleY-AI ด้วยการรันสคริปต์ sbc-bench v0.9.67 ของ Thomas Kaiser ซึ่งได้ผลลัพธ์ตามรายละเอียดด้านล่างนี้ครับ โดยพบปัญหาส่วนของการรายงานอุณหภูมิซึ่งคงต้องรอประสานงานกับทางผู้พัฒนา sbc-bench เพื่อให้ช่วยจัดการปัญหาส่วนนี้ต่อไปครับ
|
1 2 3 4 5 6 7 8 9 10 11 12 13 14 15 16 17 18 19 20 21 22 23 24 25 26 27 28 29 30 31 32 33 34 35 36 37 38 39 40 41 42 43 44 45 46 47 48 49 50 51 52 53 54 55 56 57 58 59 60 61 62 63 64 65 66 67 68 69 70 71 72 73 74 75 76 77 78 79 80 81 82 83 84 85 86 87 88 89 90 91 92 93 94 95 96 97 98 99 100 101 102 103 104 105 106 107 108 109 110 111 112 113 114 115 116 117 118 119 120 121 122 123 124 125 126 127 128 129 130 131 132 133 134 135 136 137 138 139 140 141 142 143 144 145 146 147 148 149 150 151 152 153 154 155 156 157 158 159 160 161 162 163 164 165 166 167 168 |
Starting to examine hardware/software for review purposes... Average load and/or CPU utilization too high (too much background activity). Waiting... Too busy for benchmarking: 01:10:22 up 42 min, 2 users, load average: 1.81, 1.47, 1.62, cpu: % Too busy for benchmarking: 01:10:27 up 42 min, 2 users, load average: 1.75, 1.46, 1.61, cpu: 22% Too busy for benchmarking: 01:10:32 up 42 min, 2 users, load average: 1.61, 1.44, 1.60, cpu: 1% Too busy for benchmarking: 01:10:37 up 42 min, 2 users, load average: 1.48, 1.42, 1.60, cpu: 0% Too busy for benchmarking: 01:10:42 up 42 min, 2 users, load average: 1.36, 1.39, 1.59, cpu: 0% Too busy for benchmarking: 01:10:47 up 42 min, 2 users, load average: 1.25, 1.37, 1.58, cpu: 1% Too busy for benchmarking: 01:10:52 up 42 min, 2 users, load average: 1.15, 1.35, 1.57, cpu: 1% Too busy for benchmarking: 01:10:58 up 42 min, 2 users, load average: 1.22, 1.36, 1.57, cpu: 1% sbc-bench v0.9.67 Installing needed tools: distro packages already installed. Done. Checking cpufreq OPP. Done. Executing tinymembench. Done. Executing RAM latency tester. Done. Executing OpenSSL benchmark. Done. Executing 7-zip benchmark. Done. Throttling test: heating up the device, 5 more minutes to wait. Done. Checking cpufreq OPP again. Done (18 minutes elapsed). Results validation: * No swapping * Background activity (%system) OK Full results uploaded to https://0x0.st/X3n5.bin In case this device is not already represented in official sbc-bench results list then please consider submitting it at https://github.com/ThomasKaiser/sbc-bench/issues with this line: https://0x0.st/X3n5.bin | # BeagleBoard.org BeagleY-AI Tested with sbc-bench v0.9.67 on Sat, 21 Sep 2024 01:29:10 +0000. Full info: [https://0x0.st/X3n5.bin](http://0x0.st/X3n5.bin) ### General information: J722S rev SR1.0, Kernel: aarch64, Userland: arm64 CPU sysfs topology (clusters, cpufreq members, clockspeeds) cpufreq min max CPU cluster policy speed speed core type 0 0 0 - - Cortex-A53 / r0p4 1 0 0 - - Cortex-A53 / r0p4 2 0 0 - - Cortex-A53 / r0p4 3 0 0 - - Cortex-A53 / r0p4 3792 KB available RAM ### Policies (performance vs. idle consumption): Status of performance related policies found below /sys: /sys/module/pcie_aspm/parameters/policy: [default] performance powersave powersupersave ### Clockspeeds (idle vs. heated up): Before: cpu0 (Cortex-A53): Measured: 1247 After: cpu0 (Cortex-A53): Measured: 1247 ### Performance baseline * memcpy: 1553.0 MB/s, memchr: 1419.0 MB/s, memset: 6482.4 MB/s * 16M latency: 228.6 228.8 228.2 228.7 228.4 228.4 267.9 526.0 * 128M latency: 227.9 230.3 227.9 227.7 228.0 227.9 264.3 508.4 * 7-zip MIPS (3 consecutive runs): 3166, 3188, 3188 (3180 avg), single-threaded: 932 * `aes-256-cbc 84256.63k 235248.62k 418798.25k 532320.60k 579160.75k 582576.81k` * `aes-256-cbc 83977.18k 234822.23k 418160.04k 533069.14k 579149.82k 579556.69k` ### Storage devices: * 29.7GB "SanDisk SH32G" UHS SDR104 SD card as /dev/mmcblk1: date 07/2024, manfid/oemid: 0x000003/0x5344, hw/fw rev: 0x8/0x0 ### Swap configuration: * /dev/mmcblk1p2: 4.0G (0K used) on ultra slow SD card storage ### Software versions: * Debian GNU/Linux 12 (bookworm) * Compiler: /usr/bin/gcc (Debian 12.2.0-14) 12.2.0 / aarch64-linux-gnu * OpenSSL 3.0.14, built on 4 Jun 2024 (Library: OpenSSL 3.0.14 4 Jun 2024) ### Kernel info: * `/proc/cmdline: console=ttyS2,115200n8 root=/dev/mmcblk1p3 ro rootfstype=ext4 resume=/dev/mmcblk1p2 rootwait net.ifnames=0 quiet` * Vulnerability Spectre v1: Mitigation; __user pointer sanitization * Kernel 6.1.80-ti-arm64-r57 / CONFIG_HZ=250 Kernel 6.1.80 is not latest 6.1.111 LTS that was released on 2024-09-18. See https://endoflife.date/linux for details. It is somewhat likely that some exploitable vulnerabilities exist for this kernel as well as many unfixed bugs. All known settings adjusted for performance. Device now ready for benchmarking. Once finished stop with [ctrl]-[c] to get info about throttling, frequency cap and too high background activity all potentially invalidating benchmark scores. All changes with storage and PCIe devices as well as suspicious dmesg contents will be reported too. Time CPU n/a load %cpu %sys %usr %nice %io %irq Temp 01:29:17: n/aMHz 3.16 36% 3% 33% 0% 0% 0% °C 01:30:17: n/aMHz 1.16 0% 0% 0% 0% 0% 0% °C 01:31:17: n/aMHz 0.42 0% 0% 0% 0% 0% 0% °C 01:32:17: n/aMHz 0.15 0% 0% 0% 0% 0% 0% °C 01:33:17: n/aMHz 0.06 0% 0% 0% 0% 0% 0% °C ^C Cleaning up. Done. Checking cpufreq OPP again. Done. Clockspeeds now: cpu0 (Cortex-A53): Measured: 1246 ATTENTION: lots of noise in kernel ring buffer since start of monitoring: [ 3686.263811] Deferred event dump:00000000: 00000100 000c0004 00000000 00000000 [ 3686.263836] Deferred event dump:00000010: bebe2020 00000000 00000000 00000000 [ 3686.263844] Deferred event dump:00000020: 00000000 00000000 00000000 00000000 [ 3686.263851] Deferred event dump:00000030: 00000000 00000000 00000000 00000000 [ 3716.499539] Deferred event dump:00000000: 00000100 000c0004 00000000 00000000 [ 3716.499565] Deferred event dump:00000010: bebe2020 00000100 00000000 00000000 [ 3716.499572] Deferred event dump:00000020: 00000000 00000000 00000000 00000000 [ 3716.499579] Deferred event dump:00000030: 00000000 00000000 00000000 00000000 [ 3746.781146] Deferred event dump:00000000: 00000100 000c0004 00000000 00000000 [ 3746.781172] Deferred event dump:00000010: bfbf2121 00000000 00000000 00000000 [ 3746.781179] Deferred event dump:00000020: 00000000 00000000 00000000 00000000 [ 3746.781186] Deferred event dump:00000030: 00000000 00000000 00000000 00000000 [ 3777.001646] Deferred event dump:00000000: 00000100 000c0002 00000000 00000000 [ 3777.001671] Deferred event dump:00000010: bfbf2121 00000100 00000000 00000000 [ 3777.001679] Deferred event dump:00000020: 00000000 00000000 00000000 00000000 [ 3777.001685] Deferred event dump:00000030: 00000000 00000000 00000000 00000000 [ 3807.200218] Deferred event dump:00000000: 00000100 000c0004 00000000 00000000 [ 3807.200244] Deferred event dump:00000010: c0c02222 00000000 00000000 00000000 [ 3807.200251] Deferred event dump:00000020: 00000000 00000000 00000000 00000000 [ 3807.200258] Deferred event dump:00000030: 00000000 00000000 00000000 00000000 [ 3837.499347] Deferred event dump:00000000: 00000100 000c0004 00000000 00000000 [ 3837.499371] Deferred event dump:00000010: bfbf2121 00000100 00000000 00000000 [ 3837.499379] Deferred event dump:00000020: 00000000 00000000 00000000 00000000 [ 3837.499386] Deferred event dump:00000030: 00000000 00000000 00000000 00000000 [ 3867.713361] Deferred event dump:00000000: 00000100 000c0001 00000000 00000000 [ 3867.713388] Deferred event dump:00000010: bebe2020 00000000 00000000 00000000 [ 3867.713395] Deferred event dump:00000020: 00000000 00000000 00000000 00000000 [ 3867.713402] Deferred event dump:00000030: 00000000 00000000 00000000 00000000 [ 3897.927507] Deferred event dump:00000000: 00000100 000c0002 00000000 00000000 [ 3897.927533] Deferred event dump:00000010: bfbf2121 00000100 00000000 00000000 [ 3897.927540] Deferred event dump:00000020: 00000000 00000000 00000000 00000000 [ 3897.927547] Deferred event dump:00000030: 00000000 00000000 00000000 00000000 [ 3928.232823] Deferred event dump:00000000: 00000100 000c0000 00000000 00000000 [ 3928.232851] Deferred event dump:00000010: bbbb1d1d 00000000 00000000 00000000 [ 3928.232858] Deferred event dump:00000020: 00000000 00000000 00000000 00000000 [ 3928.232865] Deferred event dump:00000030: 00000000 00000000 00000000 00000000 Results validation: * No swapping * Background activity (%system) OK |
ทดสอบประสิทธิภาพของอุปกรณ์เครือข่าย
ในช่วงที่ทำการทดสอบส่วนนี้ ผมไม่สามารถหา Router ที่รองรับ Ethernet แบบ Gigabit มาใช้งานได้ โดยการรีวิวนี้ผมใช้ TP-Link TL-MR100 4G LTE Router และ Router ตัวนี้มีความเร็ว Ethernet สูงสุด 100Mbps เท่านั้นและมีความเร็วของการสื่อสารแบบ Wi-Fi 2.4 GHz ที่ประมาณ 300Mbps ครับ ในส่วนของผลการทดสอบด้วยโปรแกรม iperf3 มีดังนี้ครับ
Ethernet: ส่ง…
|
1 2 3 4 5 6 7 8 9 10 11 12 13 14 15 16 |
(base) kumpee@BeagleBone:~$ iperf3 -c 192.168.1.102 -t 60 -i 10 Connecting to host 192.168.1.102, port 5201 [ 5] local 192.168.1.100 port 45324 connected to 192.168.1.102 port 5201 [ ID] Interval Transfer Bitrate Retr Cwnd [ 5] 0.00-10.00 sec 114 MBytes 95.9 Mbits/sec 264 231 KBytes [ 5] 10.00-20.00 sec 113 MBytes 94.9 Mbits/sec 264 238 KBytes [ 5] 20.00-30.00 sec 113 MBytes 94.9 Mbits/sec 264 214 KBytes [ 5] 30.00-40.00 sec 113 MBytes 94.9 Mbits/sec 264 184 KBytes [ 5] 40.00-50.00 sec 113 MBytes 95.0 Mbits/sec 264 187 KBytes [ 5] 50.00-60.00 sec 113 MBytes 95.0 Mbits/sec 264 200 KBytes - - - - - - - - - - - - - - - - - - - - - - - - - [ ID] Interval Transfer Bitrate Retr [ 5] 0.00-60.00 sec 680 MBytes 95.1 Mbits/sec 1584 sender [ 5] 0.00-60.01 sec 679 MBytes 94.9 Mbits/sec receiver iperf Done. |
Ethernet: รับ…
|
1 2 3 4 5 6 7 8 9 10 11 12 13 14 15 16 17 |
(base) kumpee@BeagleBone:~$ iperf3 -c 192.168.1.102 -t 60 -i 10 -R Connecting to host 192.168.1.102, port 5201 Reverse mode, remote host 192.168.1.102 is sending [ 5] local 192.168.1.100 port 55174 connected to 192.168.1.102 port 5201 [ ID] Interval Transfer Bitrate [ 5] 0.00-10.00 sec 113 MBytes 94.8 Mbits/sec [ 5] 10.00-20.00 sec 113 MBytes 94.9 Mbits/sec [ 5] 20.00-30.00 sec 113 MBytes 94.9 Mbits/sec [ 5] 30.00-40.00 sec 113 MBytes 94.9 Mbits/sec [ 5] 40.00-50.00 sec 113 MBytes 94.9 Mbits/sec [ 5] 50.00-60.00 sec 113 MBytes 94.9 Mbits/sec - - - - - - - - - - - - - - - - - - - - - - - - - [ ID] Interval Transfer Bitrate [ 5] 0.00-60.00 sec 681 MBytes 95.2 Mbits/sec sender [ 5] 0.00-60.00 sec 679 MBytes 94.9 Mbits/sec receiver iperf Done. |
Wi-Fi 2.4: ส่ง…
|
1 2 3 4 5 6 7 8 9 10 11 12 13 14 15 16 |
(base) kumpee@BeagleBone:~$ iperf3 -c 192.168.1.100 -t 60 -i 10 Connecting to host 192.168.1.100, port 5201 [ 5] local 192.168.1.103 port 52998 connected to 192.168.1.100 port 5201 [ ID] Interval Transfer Bitrate Retr Cwnd [ 5] 0.00-10.00 sec 28.1 MBytes 23.6 Mbits/sec 3 208 KBytes [ 5] 10.00-20.00 sec 30.4 MBytes 25.5 Mbits/sec 6 184 KBytes [ 5] 20.00-30.00 sec 30.8 MBytes 25.8 Mbits/sec 3 610 KBytes [ 5] 30.00-40.00 sec 30.0 MBytes 25.2 Mbits/sec 3 585 KBytes [ 5] 40.00-50.00 sec 31.2 MBytes 26.2 Mbits/sec 7 399 KBytes [ 5] 50.00-60.00 sec 31.2 MBytes 26.2 Mbits/sec 1 408 KBytes - - - - - - - - - - - - - - - - - - - - - - - - - [ ID] Interval Transfer Bitrate Retr [ 5] 0.00-60.00 sec 182 MBytes 25.4 Mbits/sec 23 sender [ 5] 0.00-60.05 sec 179 MBytes 25.0 Mbits/sec receiver iperf Done. |
Wi-Fi 2.4: รับ…
|
1 2 3 4 5 6 7 8 9 10 11 12 13 14 15 16 17 |
(base) kumpee@BeagleBone:~$ iperf3 -c 192.168.1.100 -t 60 -i 10 -R Connecting to host 192.168.1.100, port 5201 Reverse mode, remote host 192.168.1.100 is sending [ 5] local 192.168.1.103 port 52566 connected to 192.168.1.100 port 5201 [ ID] Interval Transfer Bitrate [ 5] 0.00-10.00 sec 30.5 MBytes 25.6 Mbits/sec [ 5] 10.00-20.00 sec 27.5 MBytes 23.1 Mbits/sec [ 5] 20.00-30.00 sec 26.4 MBytes 22.1 Mbits/sec [ 5] 30.00-40.00 sec 27.3 MBytes 22.9 Mbits/sec [ 5] 40.00-50.00 sec 29.5 MBytes 24.8 Mbits/sec [ 5] 50.00-60.00 sec 17.3 MBytes 14.5 Mbits/sec - - - - - - - - - - - - - - - - - - - - - - - - - [ ID] Interval Transfer Bitrate [ 5] 0.00-60.13 sec 160 MBytes 22.4 Mbits/sec sender [ 5] 0.00-60.00 sec 158 MBytes 22.2 Mbits/sec receiver iperf Done. |
ทดสอบการเล่นวิดีโอบน Youtube
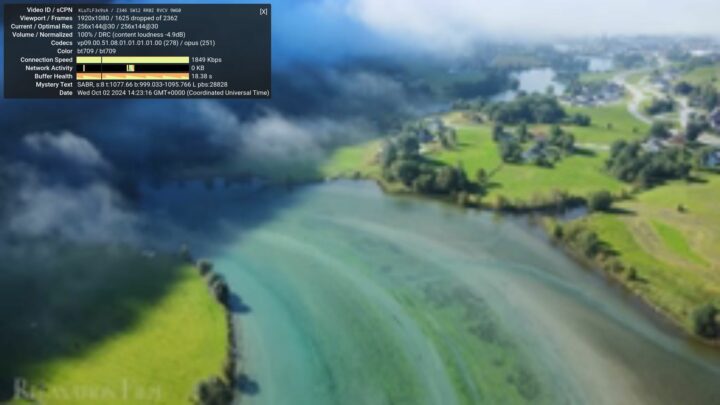
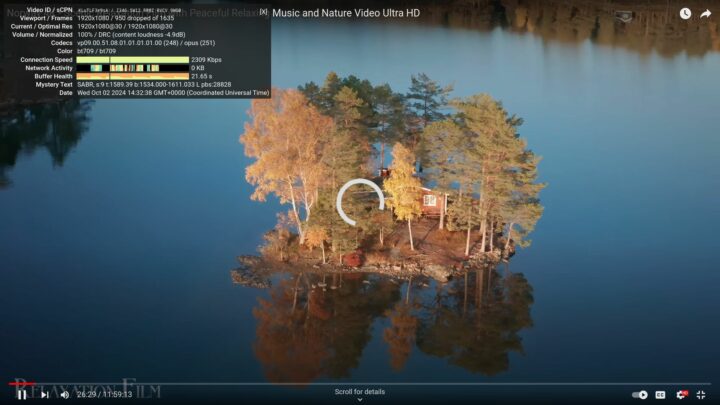
ผมทดสอบประสิทธิภาพการเล่นวิดีโอบน YouTube โดยใช้เว็บเบราเซอร์ที่มาพร้อมกับ Image File ของระบบปฏิบัติการของ BeagleY-AI ซึ่งประกอบด้วย Firefox ESR 111.15.0 (64-bit), Firefox Nightly 129.0a1 (2024-06-18) (64-bit), และ Chromium 129.0.6668.58 (64-bit) ผมได้ทดลองเล่นวิดีโอแบบ 4K โดยเปิดวิดีโอแบบเต็มจอทุกความขนาดภาพตั้งแต่ 144 จนถึง 2160 ผมพบว่าบอร์ด BeagleY-AI สามารถเล่นวิดีโอได้ดีที่สุดเมื่อกำหนดขนาดการแสดงผลเป็น 480 ซึ่งจะมี dropped rate ประมาณ 10 – 15% ถ้าขนาดภาพต่ำกว่านี้ลงไปจนถึง 144 นั้นจะมีสะดุดเพิ่มขึ้นเล็กน้อย
สำหรับการเล่นวิดีโอที่ขนาด 720 นั้นก็ยังทำได้อยู่ แต่พบการสะดุดมากขึ้นอย่างเห็นได้ชัด และเมื่อเปลี่ยนขนาดภาพเป็น 1440 หรือ 2160 แล้วก็พบว่าแทบจะไม่สามารถเล่นวิดีโอย่างต่อเนื่องได้เลย โดยเฉพาะกรณีของวิดีโอขนาด 2160 นั้นไม่สามารถเล่นได้ ตามตัวอย่างภาพหน้าจอจากที่ผมทดลองกับ Chromium ครับ




ทดสอบการทำงานของเว็บเบราเซอร์ด้วย Speedometer
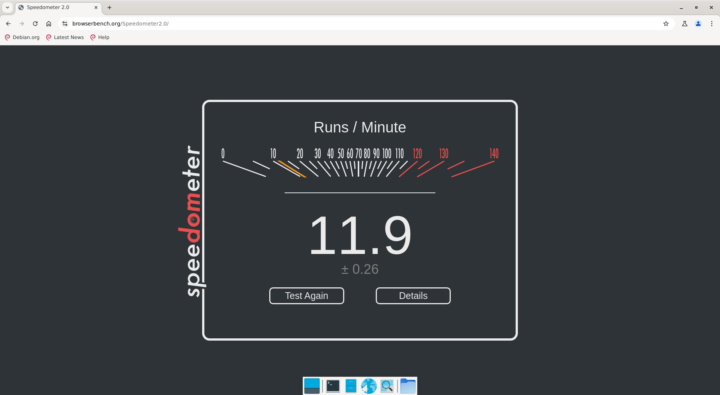
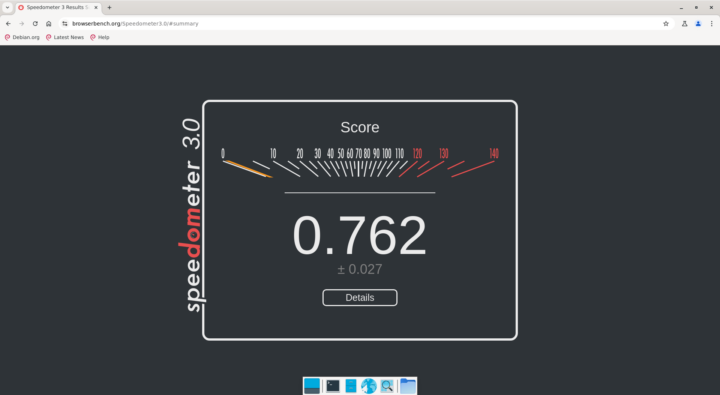
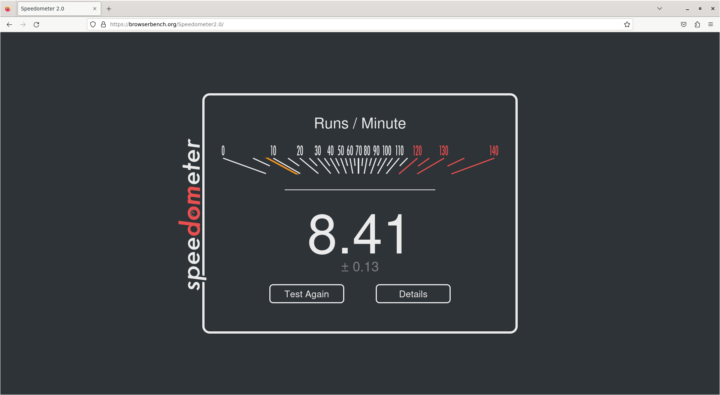
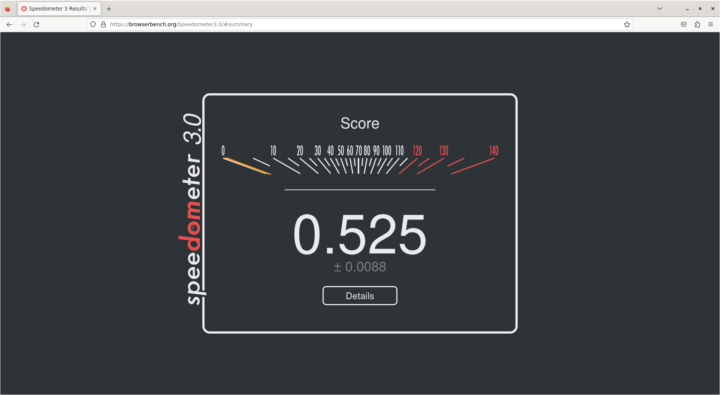
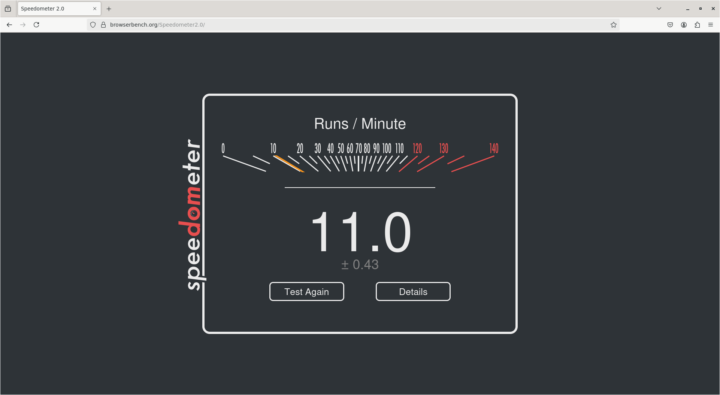
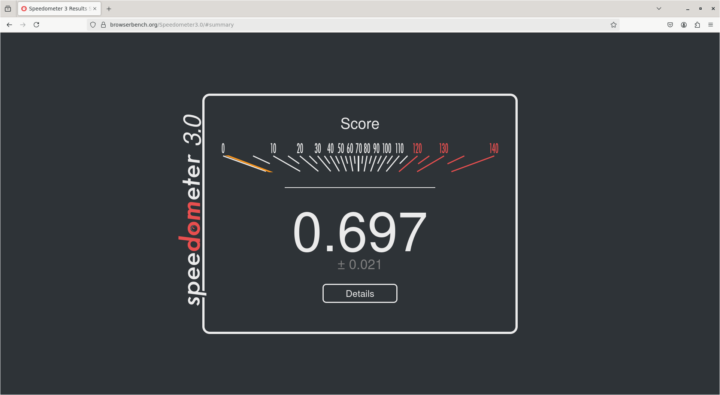
ผมเชื่อมต่ออินเทอร์เน็ตด้วย Ethernet และทดสอบการทำงานของเว็บแอปพลิเคนชันบนเว็บเบราเซอร์ด้วย Speedometer 2.0 และ Speedometer 3.0 ซึ่งได้ผลตามที่แสดงในภาพด้านล่างนี้ โดย Chromium กับ Firefox Nightly นั้นมีคะแนนใกล้เคียงกันและ Firefox ESR มีคะแนนน้อยที่สุดไม่ว่าจะทดสอบด้วย Speedometer หรือ Speedometer 3.0
ทดสอบการแสดงกราฟิกส์สามมิติบนเว็บเบราเซอร์ด้วย WebGL
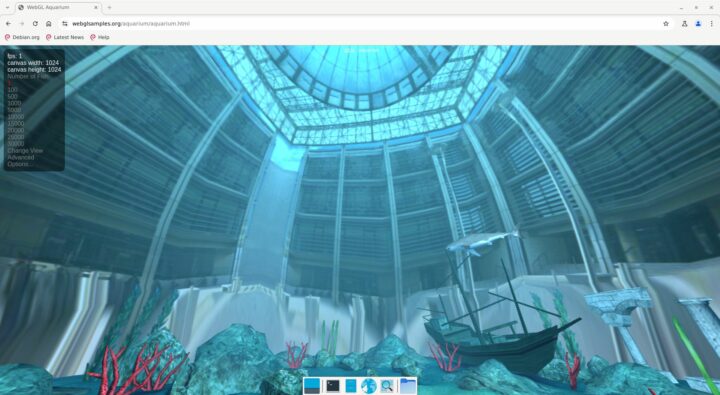
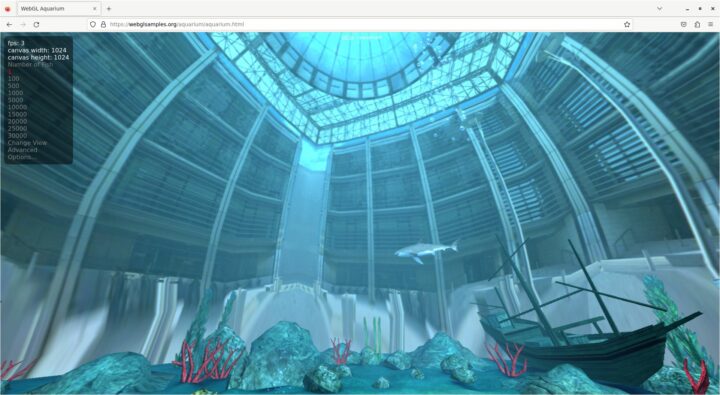
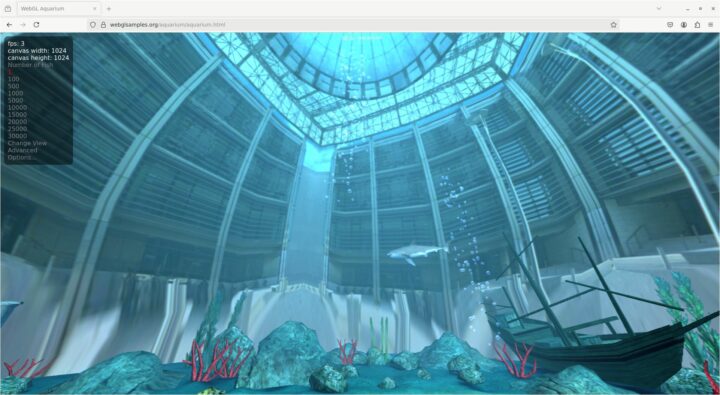
สำหรับการทดสอบประสิทธิภาพการทำงานกราฟิกส์สามมิติบนเว็บเบราเซอร์ด้วย WebGL นั้นได้ผลใกล้เคียงกัน คือ ประมวลผลไม่ทัน ผมเปิดเว็บเบราเซอร์เต็มหน้าจอและแสดงผลปลา 1 ตัวก็พบว่าการแสดงผลของ Chromium อยู่ที่ 1 FPS ในขณะที่ Firefox ทั้งสองแบบมีอัตราการแสดงผลที่ 3 FPS เท่านั้น
ทดสอบการทำงานของ GLES
ผมทดสอบการทำงานของ GLES ที่มากับระบบปฏิบัติการของ BeagleY-AI ด้วยคำสั่ง glmark2-es2 ประมาณ 4 – 5 รอบ ได้ค่า glmark2 Score เฉลี่ยประมาณ 32 ตามตัวอย่างผลการรันครั้งแรกด้านล่างนี้ โดยผลการทำงานทุกครั้งจะค่อนข้างใกล้เคียงกัน คือ แสดงผลได้ค่อนข้างราบรื่น มีการสะดุดบ้างเล็กน้อยแต่ไม่ถึงกับสังเกตเห็นได้ชัด ยกเว้นการแสดง terrain ซึ่งผมพบว่าบางครั้งสะดุดมากและทำคะแนนส่วนนี้ได้ประมาณ 1 – 2 FPS เท่านั้น
|
1 2 3 4 5 6 7 8 9 10 11 12 13 14 15 16 17 18 19 20 21 22 23 24 25 26 27 28 29 30 31 32 33 34 35 36 37 38 39 40 41 42 43 44 45 46 47 48 49 |
libEGL warning: DRI2: failed to authenticate MESA: error: ZINK: vkCreateInstance failed (VK_ERROR_INCOMPATIBLE_DRIVER) libEGL warning: egl: failed to create dri2 screen ======================================================= glmark2 2023.01 ======================================================= OpenGL Information GL_VENDOR: Mesa GL_RENDERER: llvmpipe (LLVM 17.0.6, 128 bits) GL_VERSION: OpenGL ES 3.2 Mesa 24.1.1-1bbbio0~bookworm+20240610 Surface Config: buf=32 r=8 g=8 b=8 a=8 depth=32 stencil=0 samples=0 Surface Size: 800x600 windowed ======================================================= [build] use-vbo=false: FPS: 47 FrameTime: 21.595 ms [build] use-vbo=true: FPS: 49 FrameTime: 20.558 ms [texture] texture-filter=nearest: FPS: 60 FrameTime: 16.673 ms [texture] texture-filter=linear: FPS: 59 FrameTime: 16.952 ms [texture] texture-filter=mipmap: FPS: 54 FrameTime: 18.705 ms [shading] shading=gouraud: FPS: 35 FrameTime: 29.227 ms [shading] shading=blinn-phong-inf: FPS: 29 FrameTime: 34.691 ms [shading] shading=phong: FPS: 26 FrameTime: 39.425 ms [shading] shading=cel: FPS: 26 FrameTime: 39.543 ms [bump] bump-render=high-poly: FPS: 15 FrameTime: 68.842 ms [bump] bump-render=normals: FPS: 59 FrameTime: 17.110 ms [bump] bump-render=height: FPS: 57 FrameTime: 17.700 ms [effect2d] kernel=0,1,0;1,-4,1;0,1,0;: FPS: 29 FrameTime: 35.347 ms [effect2d] kernel=1,1,1,1,1;1,1,1,1,1;1,1,1,1,1;: FPS: 17 FrameTime: 62.024 ms [pulsar] light=false:quads=5:texture=false: FPS: 54 FrameTime: 18.716 ms [desktop] blur-radius=5:effect=blur:passes=1:separable=true:windows=4: FPS: 11 FrameTime: 99.286 ms [desktop] effect=shadow:windows=4: FPS: 19 FrameTime: 53.184 ms [buffer] columns=200:interleave=false:update-dispersion=0.9:update-fraction=0.5:update-method=map: FPS: 22 FrameTime: 47.161 ms [buffer] columns=200:interleave=false:update-dispersion=0.9:update-fraction=0.5:update-method=subdata: FPS: 22 FrameTime: 47.581 ms [buffer] columns=200:interleave=true:update-dispersion=0.9:update-fraction=0.5:update-method=map: FPS: 24 FrameTime: 41.949 ms [ideas] speed=duration: FPS: 31 FrameTime: 32.799 ms [jellyfish] <default>: FPS: 16 FrameTime: 63.459 ms [terrain] <default>: FPS: 2 FrameTime: 920.595 ms [shadow] <default>: FPS: 22 FrameTime: 47.507 ms [refract] <default>: FPS: 3 FrameTime: 374.035 ms [conditionals] fragment-steps=0:vertex-steps=0: FPS: 46 FrameTime: 22.173 ms [conditionals] fragment-steps=5:vertex-steps=0: FPS: 40 FrameTime: 25.637 ms [conditionals] fragment-steps=0:vertex-steps=5: FPS: 45 FrameTime: 22.312 ms [function] fragment-complexity=low:fragment-steps=5: FPS: 40 FrameTime: 25.353 ms [function] fragment-complexity=medium:fragment-steps=5: FPS: 32 FrameTime: 32.015 ms [loop] fragment-loop=false:fragment-steps=5:vertex-steps=5: FPS: 40 FrameTime: 25.430 ms [loop] fragment-steps=5:fragment-uniform=false:vertex-steps=5: FPS: 40 FrameTime: 25.459 ms [loop] fragment-steps=5:fragment-uniform=true:vertex-steps=5: FPS: 37 FrameTime: 27.729 ms ======================================================= glmark2 Score: 32 ======================================================= |
ทดลองใช้งาน Object Detection ด้วย TensorFlow Lite
การทดสอบต่อมาก็คือการทดสอบการใช้งานปัญญาประดิษฐ์ในกลุ่ม Object Detection ด้วย TensorFlow Lite โดยผมทำตามขั้นตอนตัวอย่างที่ผู้ผลิตแสดงในเว็บ ซึ่งผมพบว่าตามได้ง่าย ผมสามารถ copy และ paste แล้วรันได้เลย ไม่ผลข้อติดขัดอะไร โดยมีขั้นตอนคร่าว ๆ ตามนี้ครับ
ขั้นแรกเป็นการติดตั้ง Conda เวอร์ชัน lightweight ด้วย Miniforge/Mambaforce 24.3.0.0
|
1 2 |
wget https://github.com/conda-forge/miniforge/releases/download/24.3.0-0/Mambaforge-24.3.0-0-Linux-aarch64.sh bash Mambaforge-24.3.0-0-Linux-aarch64.sh |
สร้าง Virtual Environment ใหม่ โดยในตัวอย่างนี้ผุ้ผลิตใช้ Python เวอร์ชัน 3.9 เสร็จแล้วลง numpy และ OpenCV ต่อด้วยคำสั่งเหล่านี้
|
1 2 3 4 |
conda create --name myenv python=3.9 pip install https://github.com/google-coral/pycoral/releases/download/v2.0.0/tflite_runtime-2.5.0.post1-cp39-cp39-linux_aarch64.whl pip install numpy==1.26.4 pip install opencv-python |
หลังจากนั้นจึงไปดาวน์โหลด pretrained models มาจาก Google-Coral ซึ่งผู้ผลิตเลือกใช้โมเดล COCO SSD MobileNet ซึ่งผมก็ดาวน์โหลดมาและขยายไฟล์ไว้ตามตัวอย่าง
|
1 2 3 4 |
mkdir object-recognition cd object-recognition wget https://storage.googleapis.com/download.tensorflow.org/models/tflite/coco_ssd_mobilenet_v1_1.0_quant_2018_06_29.zip unzip coco_ssd_mobilenet_v1_1.0_quant_2018_06_29.zip -d TFLite_model |
ผมทดสอบการทำงานกับภาพนิ่งก่อน โดยนำโค๊ดที่ผู้ผลิตเตรียมให้มาแก้ไข ก็พบว่าทำงานได้ดี สำหรับการทดลองต่อกล้องเพื่อทดสอบการทำงานแบบ realtime นั้น ผมใช้กล้อง RAPOO C260 ซึ่งเป็น USB web camera ความละเอียด 1080p ต่อกับ USB port ของ BeagleY-AI จากนั้นผมรันคำสั่งต่อไปนี้เพื่อตรวจสอบอุปกรณ์หาข้อมูลกล้อง ในตัวอย่างของผู้ผลิตระบุเป็นอุปกรณ์หมายเลข 3 ซึ่งผลทดลองแล้วได้ผลลัพธ์เดียวกัน สามารถนำข้อมูลนี้ไปใช้ได้ทันที
|
1 2 3 4 5 6 7 8 |
ls -l /dev | grep video crw-rw---- 1 root video 29, 0 Sep 22 15:26 fb0 crw-rw----+ 1 root video 234, 0 Sep 22 15:27 media0 crw-rw----+ 1 root video 81, 0 Sep 22 15:26 video0 crw-rw----+ 1 root video 81, 1 Sep 22 15:26 video1 crw-rw----+ 1 root video 81, 2 Sep 22 15:26 video2 crw-rw----+ 1 root video 81, 3 Sep 22 15:27 video3 crw-rw----+ 1 root video 81, 4 Sep 22 15:27 video4 |
ในส่วนรายละเอียดของโค๊ดส่วนที่สำคัญนอกจากการเตรียมคลาสกล้องนั้น โค๊ดตัวอย่างก็จะมีการโหลดและเตรียมโมเดลให้พร้อมใช้งานตามบรรทัดคำสั่งด้านล่างนี้
|
1 2 3 4 5 6 7 8 9 10 11 12 13 14 15 |
... # Load labels and interpreter labels = load_labels(labelmap_path) interpreter = Interpreter(model_path=model_path) interpreter.allocate_tensors() # Get model details input_details = interpreter.get_input_details() output_details = interpreter.get_output_details() height, width = input_details[0]['shape'][1:3] floating_model = (input_details[0]['dtype'] == np.float32) outname = output_details[0]['name'] boxes_idx, classes_idx, scores_idx = (1, 3, 0) if 'StatefulPartitionedCall' in outname else (0, 1, 2) ... |
หลังจากนั้นจะเป็นการเรียกใช้งานเพื่อตรวจหาวัตถุในภาพ ซึ่งโค๊ดส่วนนี้จะแปลงภาพให้อยู่ในรูปแบบ float32 แล้ว normalize ช่วงข้อมูล เสร็จแล้วจึงทำการ detect วัตถุในภาพแล้วนำผลที่ได้มาวาด
|
1 2 3 4 5 6 7 8 9 10 11 12 13 14 15 16 17 18 19 |
... input_data = np.expand_dims(frame_resized, axis=0) if floating_model: input_data = (np.float32(input_data) - 127.5) / 127.5 interpreter.set_tensor(input_details[0]['index'], input_data) interpreter.invoke() boxes = interpreter.get_tensor(output_details[boxes_idx]['index'])[0] classes = interpreter.get_tensor(output_details[classes_idx]['index'])[0] scores = interpreter.get_tensor(output_details[scores_idx]['index'])[0] for i in range(len(scores)): if min_conf_threshold < scores[i] <= 1.0: ymin, xmin, ymax, xmax = [int(coord) for coord in (boxes[i] * [resH, resW, resH, resW])] cv2.rectangle(frame, (xmin, ymin), (xmax, ymax), (10, 255, 0), 2) ... ... |
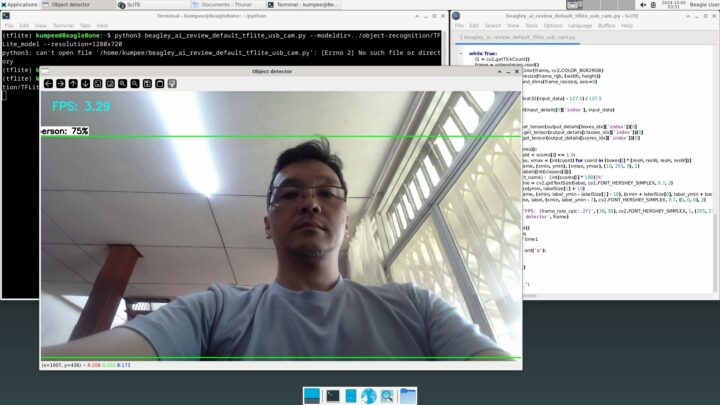
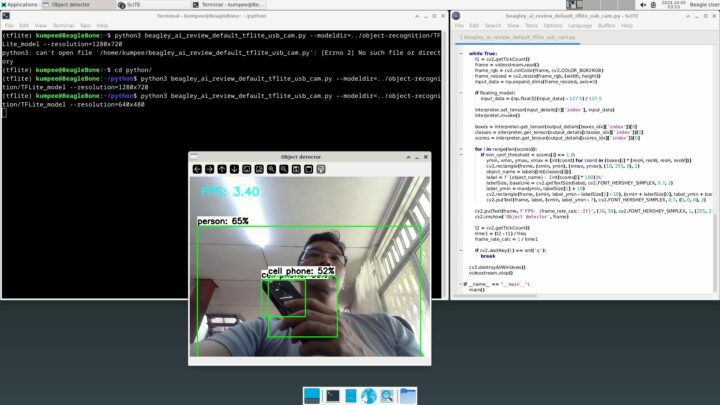
ผมรันโค๊ดนี้แล้วได้ผลตามภาพด้านล่าง พบว่า BeagleY-AI มีอัตราการแสดงผลประมาณ 3FPS ซึ่งได้ผลลัพธ์ใกล้เคียงกับผู้ใช้รายอื่น ซึ่งจากการค้นหาผมพบว่าผู้ใช้งานบางรายแจ้งว่าถ้าเราอยากให้บอร์ด BeagleY-AI ประมวลผลเร็วขึ้นนั้นเราจำเป็นจะต้องใช้คลังโปรแกรม Texas Instruments Deep Learning (TIDL) แต่มีผู้ใช้หลายรายโพสเรื่องปัญหาการใช้งาน Image จาก TI ซึ่งยังคงใช้งานไม่ได้ และยังไม่มีตัวอย่างอย่างเป็นทางการจากผู้ผลิตในขณะนี้ ดังนั้นผมจึงหยุดการทดลองส่วนนนี้เพียงเท่านี้ครับ
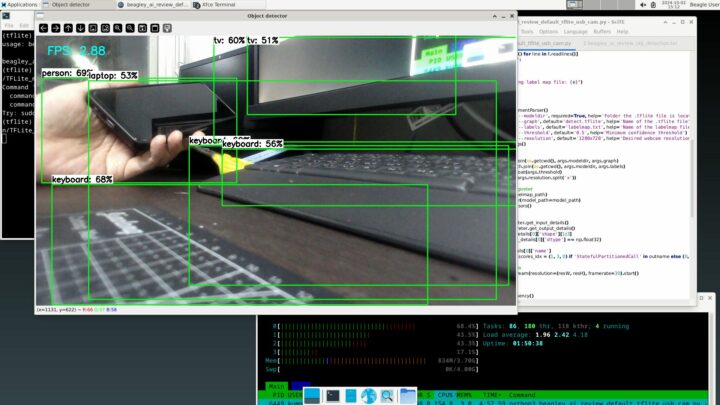
ผมลองเปิด htop เพื่อตรวจสอบดูว่าการรันโค๊ดชุดนี้ใช้ CPU มากน้อยขนาดไหน ผมพบว่าการรัน Object Detection ด้วย TensorFlow Lite นี้ไม่ได้ใช้ CPU ของ BeagleY-AI เต็มที่ทุกแกน และจากการตรวจสอบด้วยสายตาก็พบว่าใช้ CPU เฉลี่ยแล้วประมาณ 50%
ทดลองใช้งานด้านการประมวลผลภาพด้วย Google MediaPipe
เนื่องจากผมหาตัวอย่างการใช้งานอื่น ๆ จากผู้ผลิต BeagleY-AI ที่เกี่ยวข้องกับปัญญาประดิษฐ์หรือการประมวลผลภาพไม่เจอ ผมจึงลองทดสอบการใช้งานบอร์ดกับ Google MediaPipe ซึ่งเป็นคลังโปรแกรมจาก Google สำหรับงานด้าน Machine Learning โดยการหัวข้อนี้ผมจะทดลองใช้งานภาษา Python กับกลุ่มการทำงานด้าน Object Detection, การแบ่งส่วนภาพ (Image Segmentation), การตรวจหาจุดสำคัญบนใบหน้า (Face Landmark Detection), และการรู้จำท่าทางมือ (Gesture Recogntion) ครับ
สำหรับการเตรียมใช้งาน MediaPipe นั้นผมทำตามตัวอย่างใน Guide ของ MediaPipe ตามแต่ละหัวข้อที่ต้องการ สิ่งที่แรกผมต้องทำติดตั้งคือติดตั้ง MediaPipe ด้วยคำสั่ง
|
1 |
python -m pip install mediapipe |
หลังจากนั้นจะเป็นการเตรียมการใช้งานมอดูลที่เราเลือกใช้ ซึ่งเราจะต้องกำหนดตัวเลือก (option) ต่าง ๆ ของคลาสที่ต้องการใช้ให้ถูกต้อง จากนั้นสร้างวัตถุของคลาสนั้นขึ้นมาเสร็จแล้วจึงค่อยเรียกใช้งาน ตัวอย่างด้านล่างนี้จะเป็นการเตรียมใช้งาน Object Detection ซึ่งเราจะต้องไปเลือกและดาวน์โหลดโมเดลที่ต้องการมารอไว้ก่อน โดยในตัวอย่างนี้ผมเลือกโมเดล EfficientDet-Lite0 มาใช้งาน จากนั้นจึงกำหนด option ให้พร้อมใช้งาน
|
1 2 3 4 5 6 7 8 9 10 11 12 13 14 15 16 17 18 19 |
import mediapipe as mp from mediapipe.tasks import python from mediapipe.tasks.python import vision ... BaseOptions = mp.tasks.BaseOptions ObjectDetector = mp.tasks.vision.ObjectDetector ObjectDetectorOptions = mp.tasks.vision.ObjectDetectorOptions VisionRunningMode = mp.tasks.vision.RunningMode ... # SelfieSegmenter (landscape): 144x256 model_path = '/home/kumpee/python/efficientdet_lite2.tflite' base_options = BaseOptions(model_asset_path=model_path) ... # Create a image segmenter instance with the image mode: options = ObjectDetectorOptions( base_options=base_options, running_mode=VisionRunningMode.IMAGE, max_results=5,) detector = ObjectDetector.create_from_options(options) |
หลังจากนั้นเราก็จะสามารถเรียกใช้งาน object detector นี้ได้ตามต้องการ ซึ่งในกรณีของผมที่อ่านภาพวิดีโอด้วย OpenCV มานั้น ผมจะต้องแปลงข้อมูลภาพด้วย mp.Image เพื่อให้ MediaPipe นำไปใช้ได้ จากนั้นแค่เรียกเมธอด detect ก็จะได้ผลลัพธ์ออกมาและนำมาแสดงผลได้ตามโค๊ดตัวอย่างต่อไปนี้
|
1 2 3 4 5 6 7 8 9 10 11 12 13 14 15 16 17 18 19 20 21 22 23 24 25 |
... mp_image = mp.Image( image_format=mp.ImageFormat.SRGB, data=frame) # Run the task detection_result = detector.detect(mp_image) for obj in detection_result.detections: x1 = int(obj.bounding_box.origin_x*sf_x) y1 = int(obj.bounding_box.origin_y*sf_y) x2 = x1 + int(obj.bounding_box.width*sf_x) y2 = y1 + int(obj.bounding_box.height*sf_y) cv2.rectangle( frame_ori, (x1, y1), (x2, y2), (255,255,0), 1) cv2.putText( frame_ori, "{:}".format(obj.categories[0].category_name), (x1, y1), cv2.FONT_HERSHEY_SIMPLEX, 0.5, (255, 255, 255), 1, cv2.LINE_AA) ... |
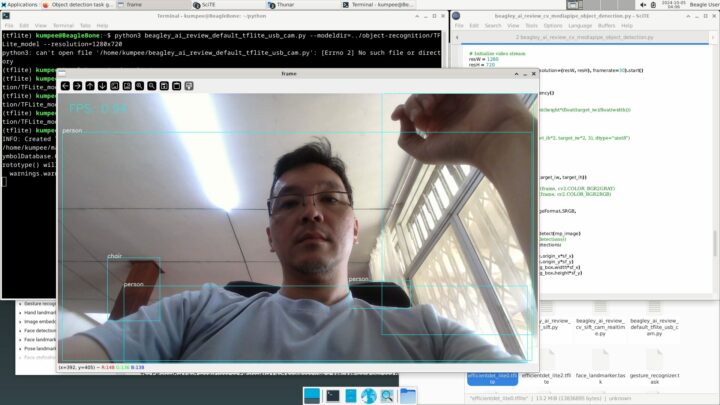
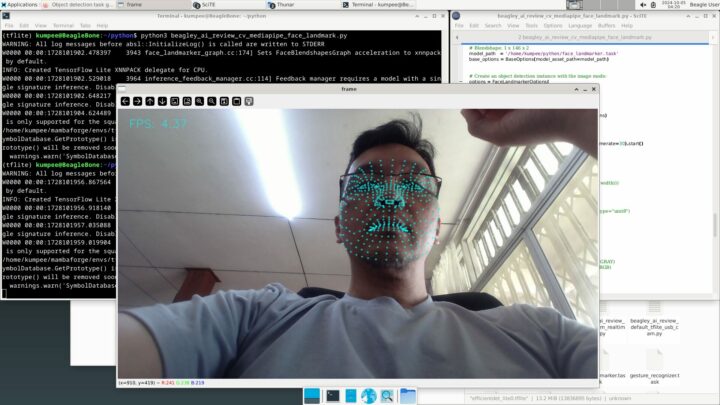
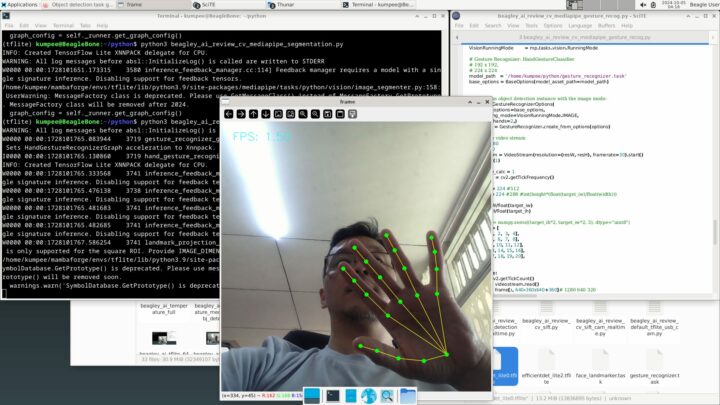
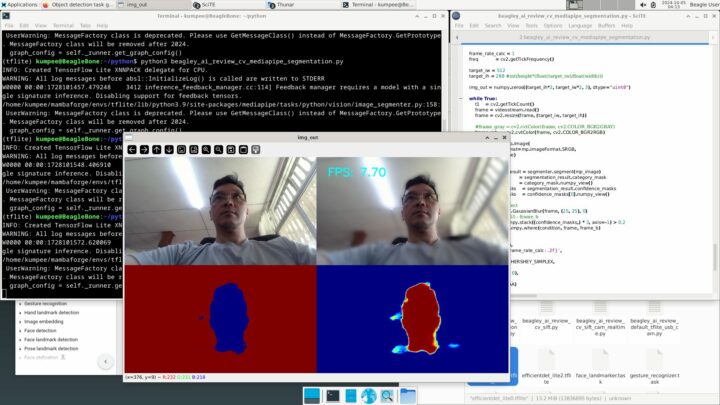
ผลการทดสอบผมพบว่าการเรียกใช้งาน MediaPipe Object Detection นั้นมีอัตราการแสดงผลประมาณ 1FPS ในขณะที่การรัน Gesture Recognition นั้นมีอัตราการแสดงผลเฉลี่ยประมาณ 1.5FPS และการรัน Face Landmark Detetor นั้นมีอัตราการแสดงผลเร็วขึ้นมาเป็นประมาณ 4.3FPS สำหรับการรัน Image Segmentation นั้นผมลองใช้งานเพื่อแบ่งส่วนภาพคนในภาพออกจากพื้นหลังและเบลอพื้นหลังเล็กน้อย ประสิทธิการการแสดงผลถ้าผมกำหนดขนาด kernel ของฟังก์ชัน GaussianBlur เป็น 25×25 พิกเซลนั้นจะอยู่ที่ประมาณ 7FPS แต่ถ้าลดขนาด kernel ลงมาเป็น 3×3 พิกเซลแล้วจะเพิ่มอัตราการแสดงผลขึ้นมาได้ถึง 9.5FPS
ทดสอบการสกัด SIFT Features
อีกส่วนหนึ่งคืออยากทดสอบคือ SIFT (Scale-invariant feature transform) เนื่องจากเป็นอัลกอริทึมหนึ่งที่สามารถใช้เพื่อสกัดฟีเจอร์เด่น ๆ ในภาพ และสามารถนำฟีเจอร์นี้จะเป็นข้อมูลพื้นฐานสำหรับการนำไปประยุกต์ต่อได้หลายทางไม่ว่าจะเป็นการจับคู่ภาพ (image matching), การสร้างภาพต่อ (mosaicing) และการคำนวณ Epipolar Geometry
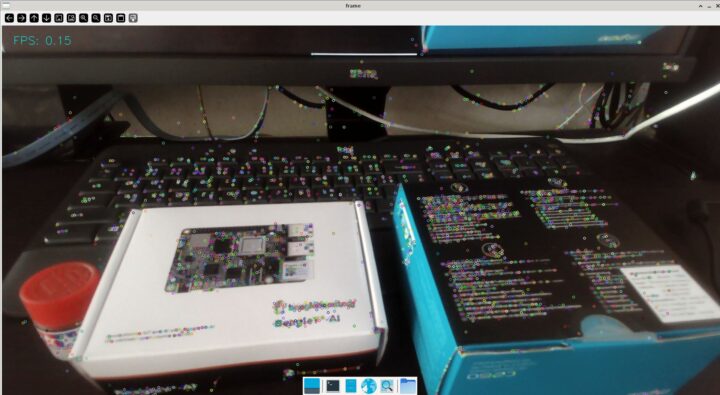
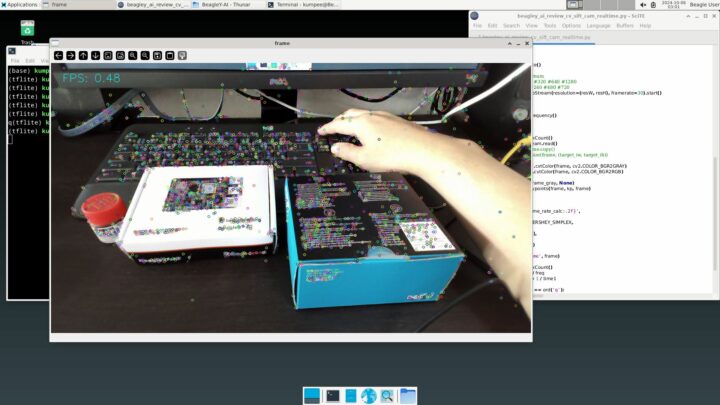
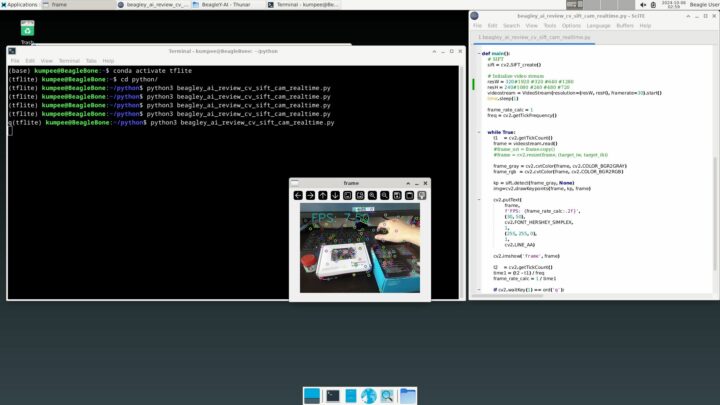
การใช้เรียกใช้งาน SIFT ใน OpenCV ทำได้ง่าย และการเรียกใช้งานบนบอร์ดนี้ก็ทำได้โดยไม่ติดขัดอะไร ในโค๊ดตัวอย่างด้านล่างนี้ผมใช้ USB web camera ตัวเดิม และผมสร้างตัวแปรมาเพื่อใช้งาน SIFT ด้วยการเรียก cv2.SIFT_create() หลังจากนั้นจึงนำไปใช้งานในการสกัดฟีเจอร์หรือ keypoints ภาพจากวิดีโอแต่ละเฟรมด้วยการเรียกเมธอด detect และใช้ cv2.drawKeypoints วาด keypoints ที่ตรวจพบ โปรแกรมนี้มีอัตราการแสดงผลกับภาพวิดีโอขนาด 1920×1080 พิกเซลประมาณ 0.1FPS, ภาพวิดีโอขนาด 1280×720 พิกเซลประมาณ 0.5FPS, และภาพวิดีโอขนาด 320×240 พิกเซลประมาณ 7.5FPS ตามตัวอย่างภาพด้านล่างนี้
|
1 2 3 4 5 6 7 8 9 10 11 |
import cv2 ... def main(): ... sift = cv2.SIFT_create() .... frame_gray = cv2.cvtColor(frame, cv2.COLOR_BGR2GRAY) .... kp = sift.detect(frame_gray, None) img = cv2.drawKeypoints(frame, kp, frame) .... |
อื่น ๆ
วัดอุณหภูมิขณะใช้งานเต็มที่
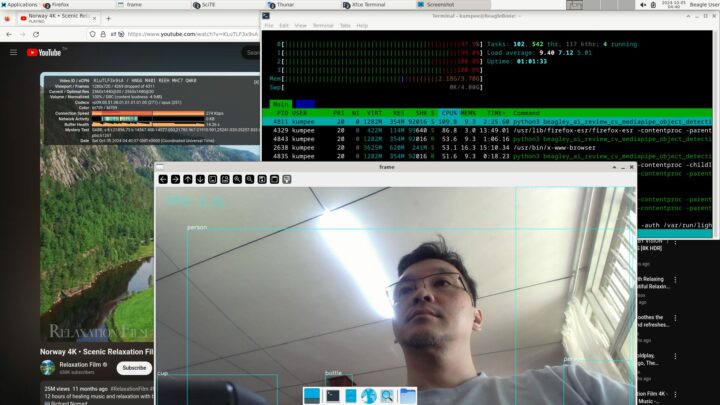
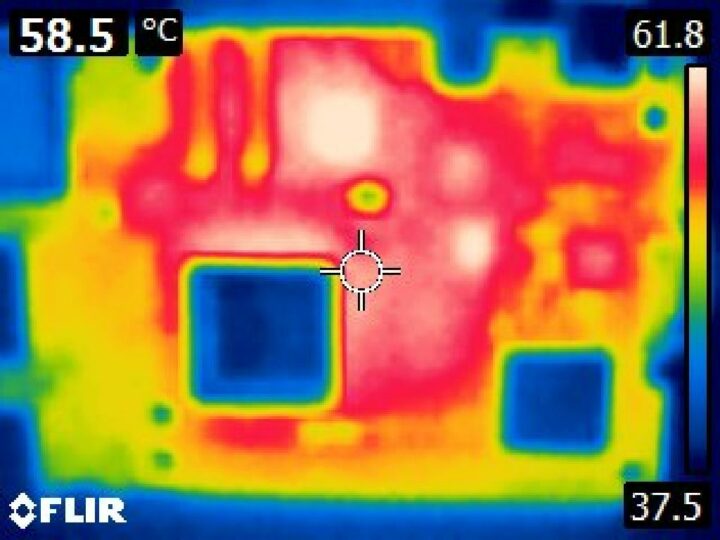
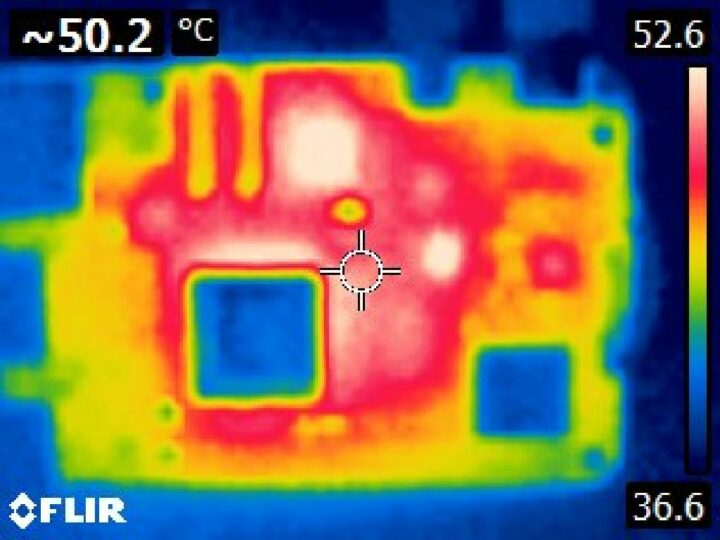
สำหรับการทดสอบอุณหภูมิของบอร์ด BeagleY-AI นั้น ผมทดลองตอนกลางวันที่มีอุณหภูมิห้องประมาณ 31C โดยใช้กล้อง FLIR E4 วัดอุณหภูมิของบอร์ด ครั้งแรกวัดหลังจากบูตเสร็จใหม่ ๆ ยังไม่ได้เปิดโปรแกรมใด ๆ พบว่าอุณหภูมิสูงสุดของบอร์ดอยู่ที่ประมาณ 42 – 45C หลังจากนั้นผมจึงลองทดสอบเปิดโปรแกรมให้บอร์ดทำงานเต็มที่ โดยผมได้เล่นวิดีโอ 4K ใน YouTube ตั้งค่าขนาดภาพเป็น 2160 และแสดงผลแบบเต็มหน้าจอ รวมทั้งรันโค๊ด Object Detection บน TensorFlow Lite ไปพร้อมกัน ผมปล่อยให้บอร์ด BeagleY-AI ทำงานเช่นนี้ไปประมาณ 10 นาทีแล้วจึงวัดอุณหภูมิ ได้ค่าอุณหภูมิสูงสุดประมาณ 61C และยังคงเพิ่มขึ้นไปเรื่อย ๆ ช้า ๆ หลังจากนั้นผมจึงลองนำพัดลมตั้งโต๊ะมาเปิดเป่าระบายความร้อนให้บอร์ด พบว่าความร้อนลดลงแทบจะทันทีโดยใช้เวลาสักครู่ก็ลดลงมาอยู่ที่ประมาณ 51C
วัดการใช้พลังงาน
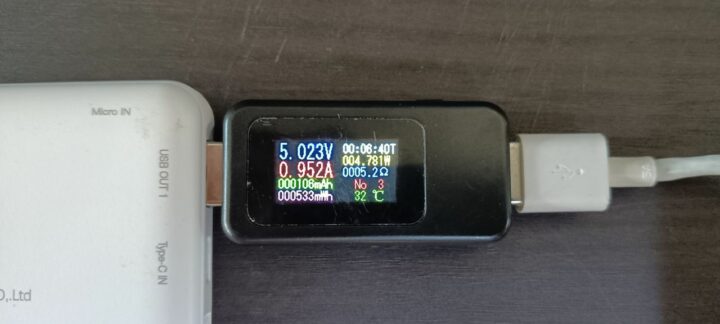
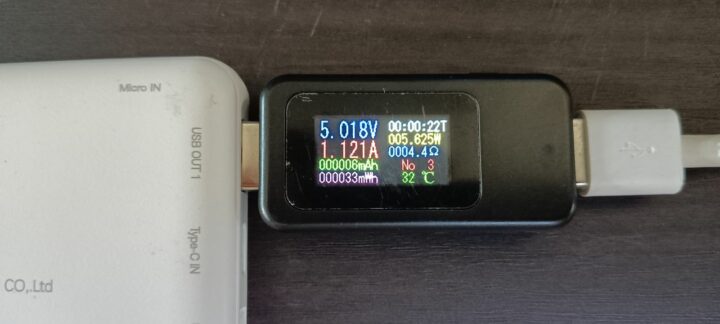
ผมวัดการใช้พลังงานของ BeagleY-AI ด้วย USB Power Meter พบว่ากรณีเมื่อบอร์ด BeagleY-AI อยู่ในสถานะ idle นั้นใช้พลังงานประมาณ 4.7 – 4.8W ส่วนการใช้พลังงานในขณะที่เล่นวิดีโอ YouTube 4K แบบเต็มจอนั้นบอร์ดจะใช้พลังงานประมาณ 5.5 – 5.8W ตามตัวอย่างในภาพด้านล่างครับ
ตรวจสอบไฟล์อื่น ๆ ที่ผู้ผลิตเปิดให้เข้าถึงได้
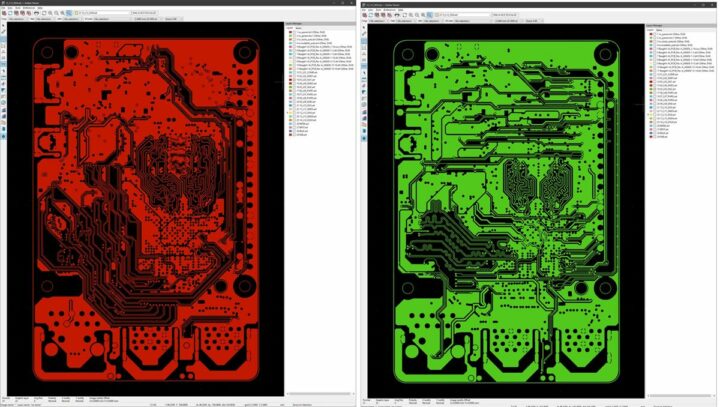
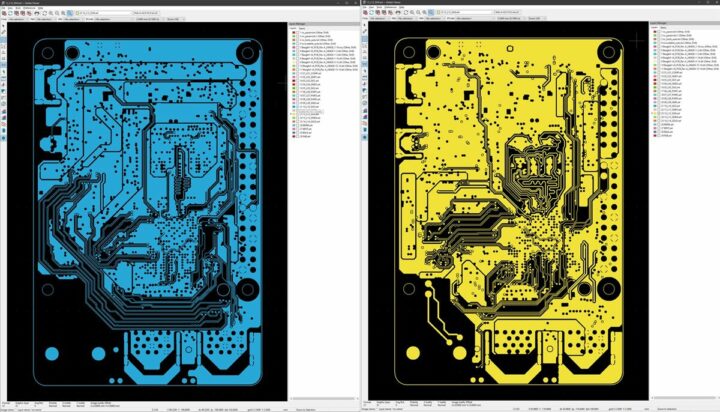
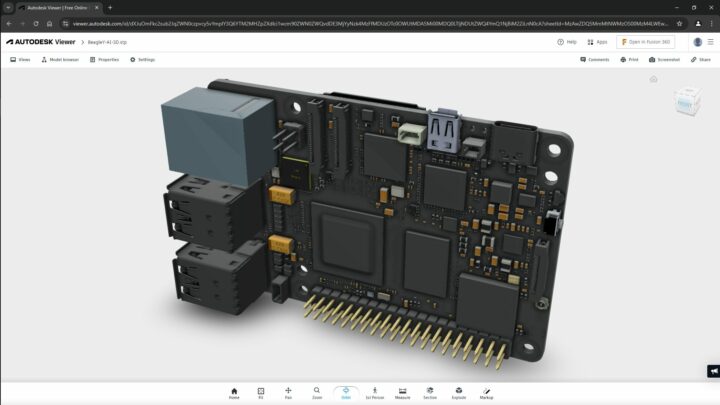
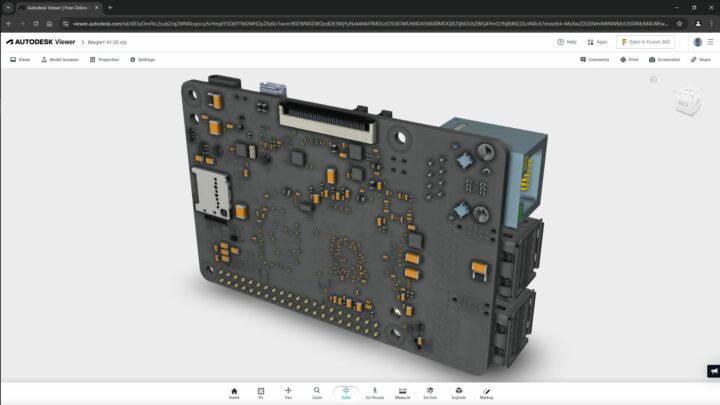
ในส่วนของข้อมูลอื่น ๆ ของบอร์ดที่เราเข้าถึงได้นั้นเราก็จะตรวจสอบเพิ่มเติมได้จาก https://openbeagle.org/beagley-ai/beagley-ai เช่น ไฟล์ 3D, ใบรับรอง, ภาพถ่ายของบอร์ด และไฟล์ PCB ซึ่งไฟล์ 3D นั้นเป็นผู้ผลิตให้มาเป็นไฟล์ STP (STEP fileformat) ซึ่งผมทดลองนำไปเปิดดูจากเว็บ Autodesk Viewer ได้ สำหรับ schematic diagram นั้นให้มาในรูปแบบของ PDF และผู้ผลิตให้ข้อมูล PCB มาเป็นไฟล์ BRD แต่ผมไม่มีโปรแกรมที่เปิดได้ จึงลองนำไฟล์ gerbers มาเปิดด้วย KiCad’s Gerber Viewer ตามภาพด้านล่างนี้ครับ
ภาพตัวอย่างไฟล์ Gerber ของ BeagleY-AI
สรุป
โดยรวมแล้ว BeagleY-AI เป็น SBC ที่ทำงานได้ดี มีเอกสารที่สามารถทำตามและเริ่มต้นใช้งานได้ง่าย อย่างไรก็ตามผมพบว่าในการรีวิวครั้งนี้ผมหาเอกสารกลุ่ม tutorials อย่างเป็นทางการจากเว็บไซต์ของผู้ผลิตได้ยาก โดยเฉพาะตัวอย่างที่เกี่ยวกับการเขียนโปรแกรมเพื่อทดสอบประสิทธิภาพของการใช้งานหน่วยประมวลผลด้านปัญญาประดิษฐ์นั้น ณ ขณะที่เขียนรีวิวนี้ผมพบแค่ตัวอย่างการใช้ TensorFlow Lite เท่านั้น
สำหรับการรีวิวครั้งนี้ผมก็ต้องขอขอบคุณผู้ผลิตที่ส่ง BeagleY-AI มาให้ทดสอบครับ ผู้ที่สนใจสามารถซื้อบอร์ดนี้จาก Element14 ราคาประมาณ 2,400฿ หรือ Seeed Studio ในราคา $70 (~2,300฿)

I am an assistant professor in surveying engineering and geographic information systems at Rambhai Barni Rajabhat University. My primary research areas include digital image/audio processing, digital photogrammetry, AI, IoT, and UAV. I am open to other subjects as well.

